

MY FINAL PATTERN
BY PATI PALMER
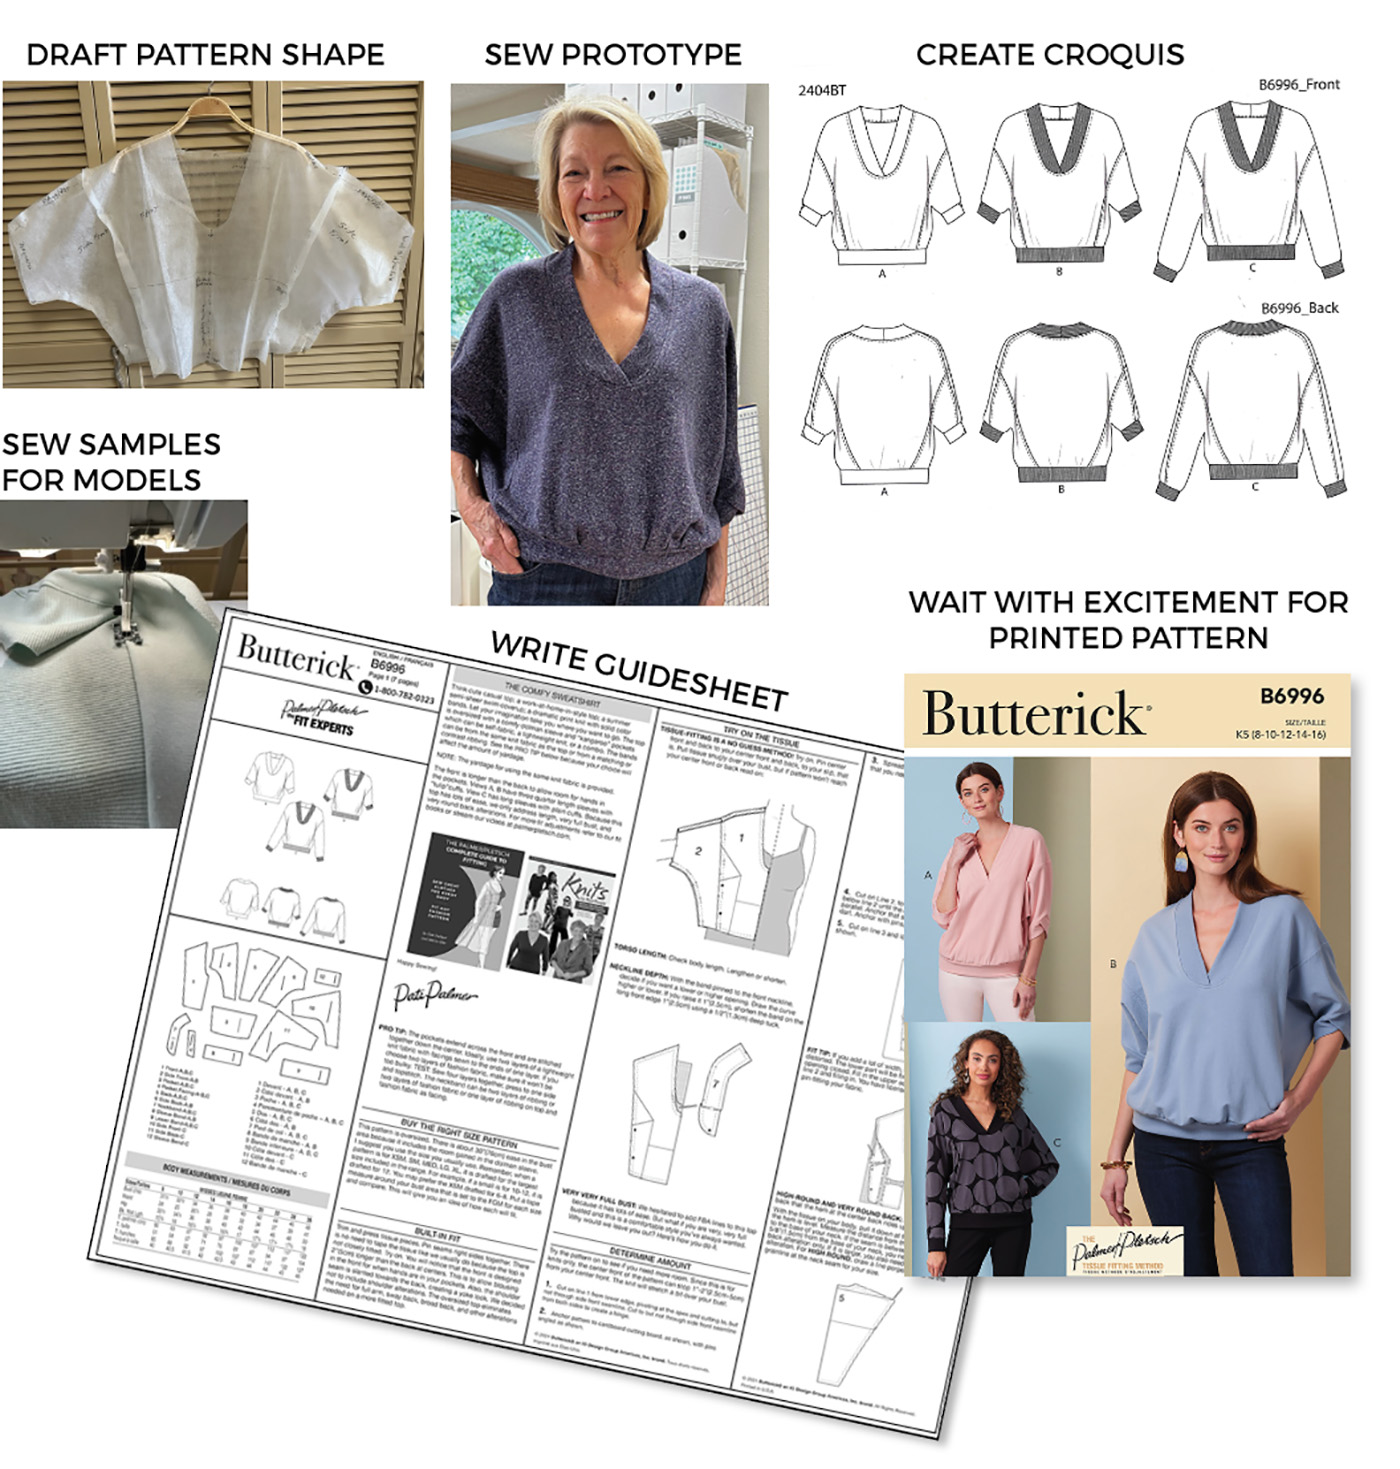
THE JOURNEY OF MY FINAL PATTERN
TRY ON TIME AT A WORKSHOP
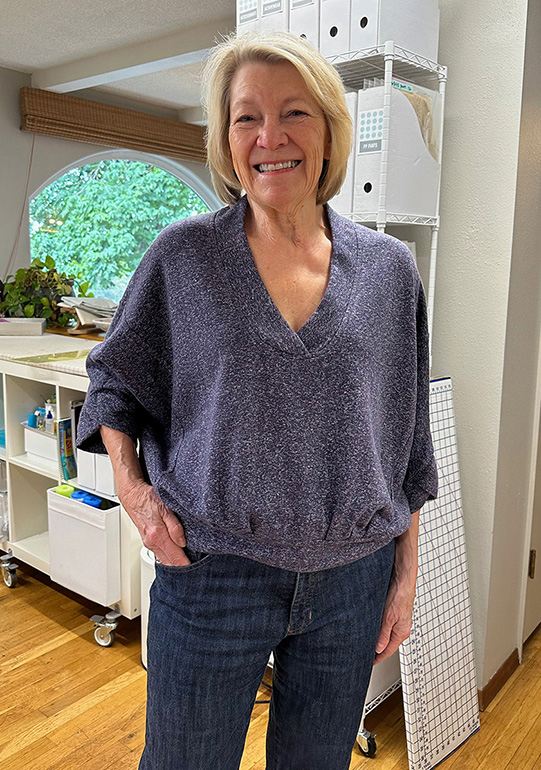
Even though all the tops were sewn in a size 10, they are oversized and fit everyone except Helen who will cut a size 8. We checked fit for body and sleeve length and depth of the V-neck. We suggested changes for each person.
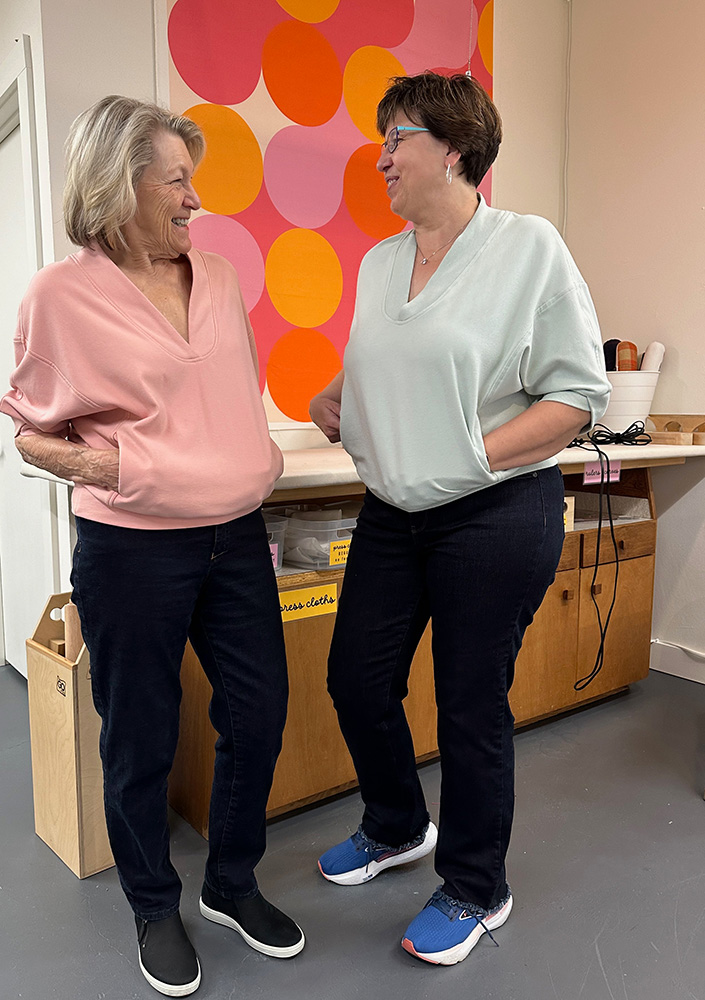
I am wearing the super soft coral bamboo fleece and Nanette Reid is in the mint cotton fleece with matching ribbing.
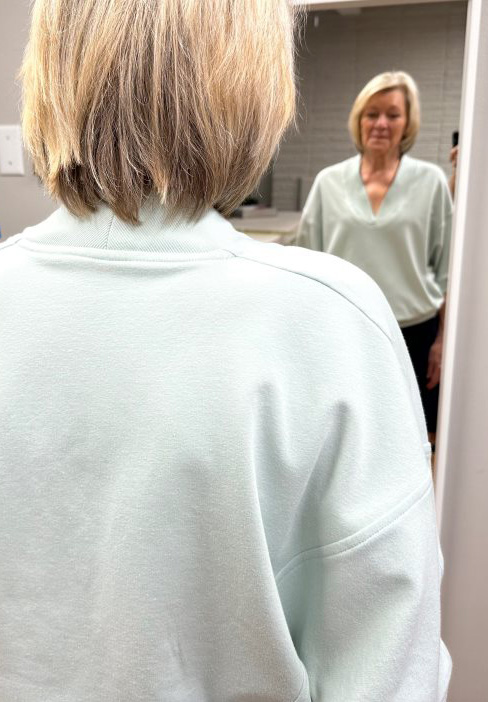
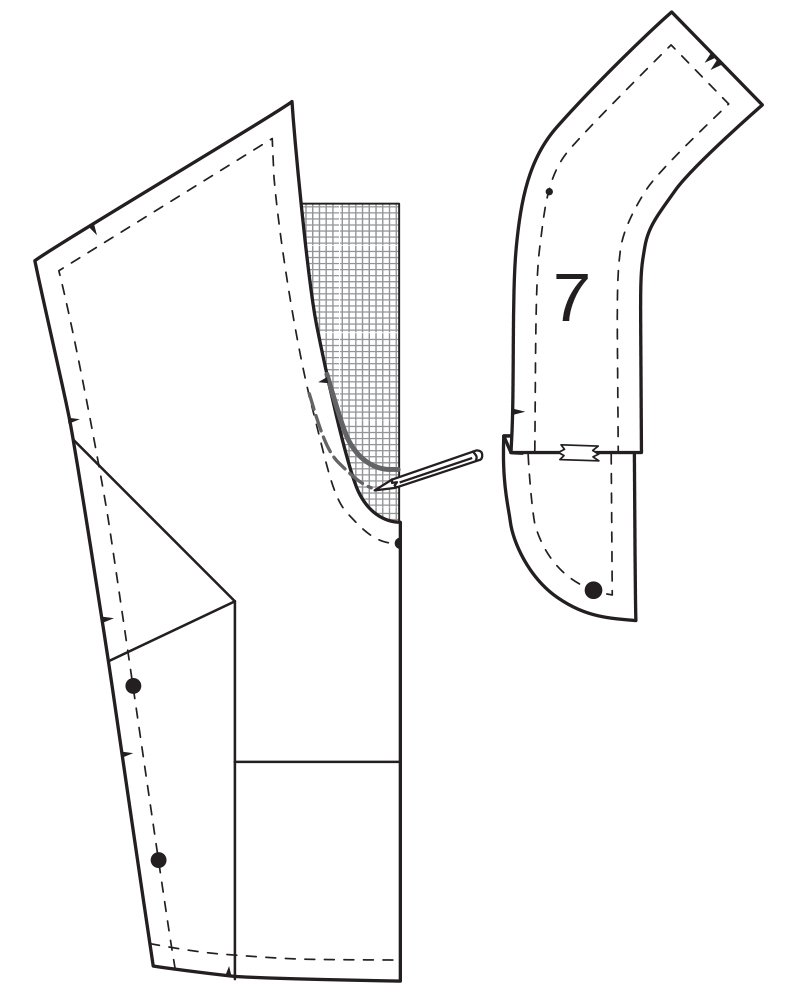
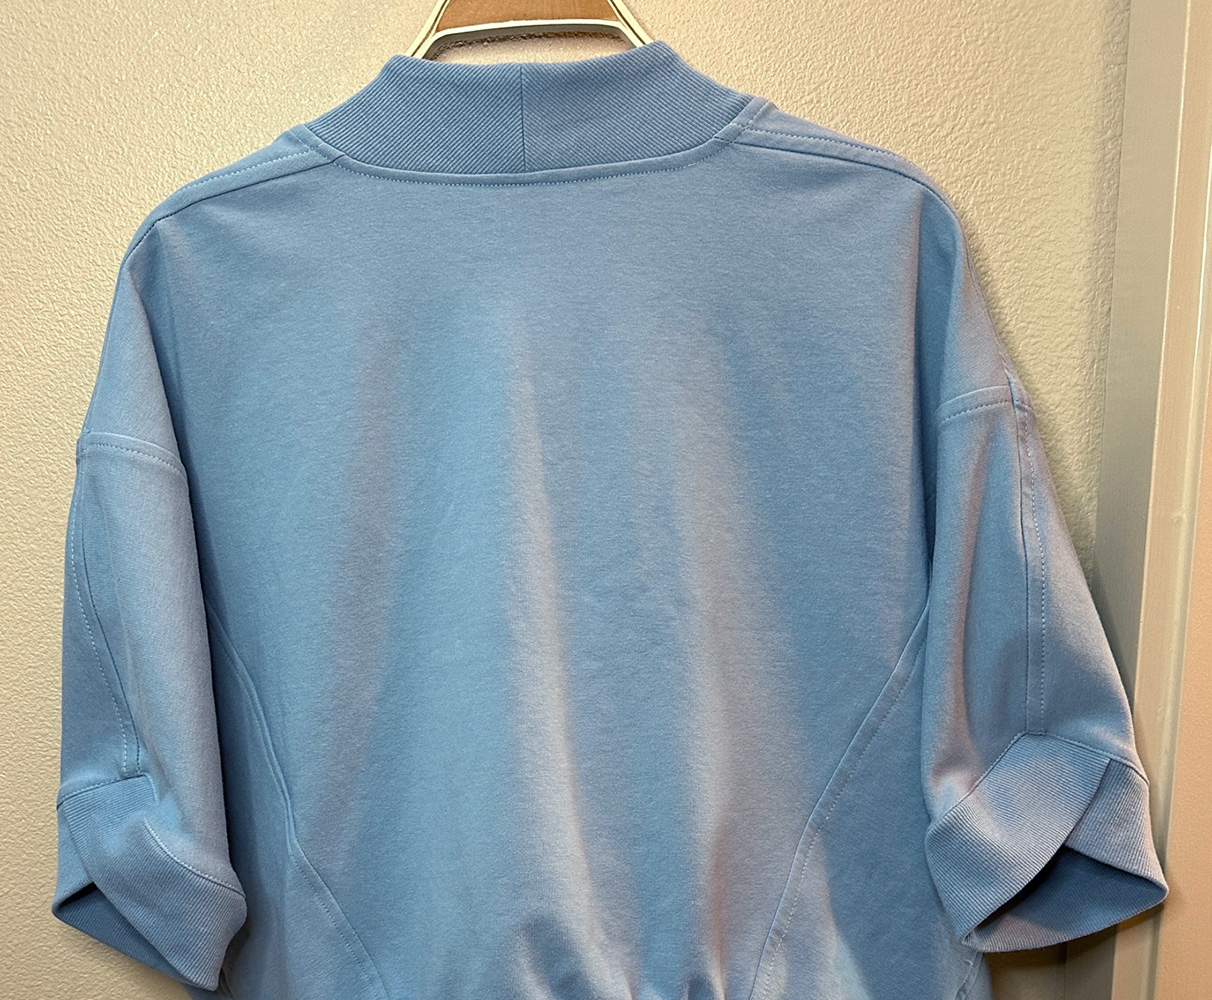
I noted for everyone that the shoulder seam was designed to be toward the back.
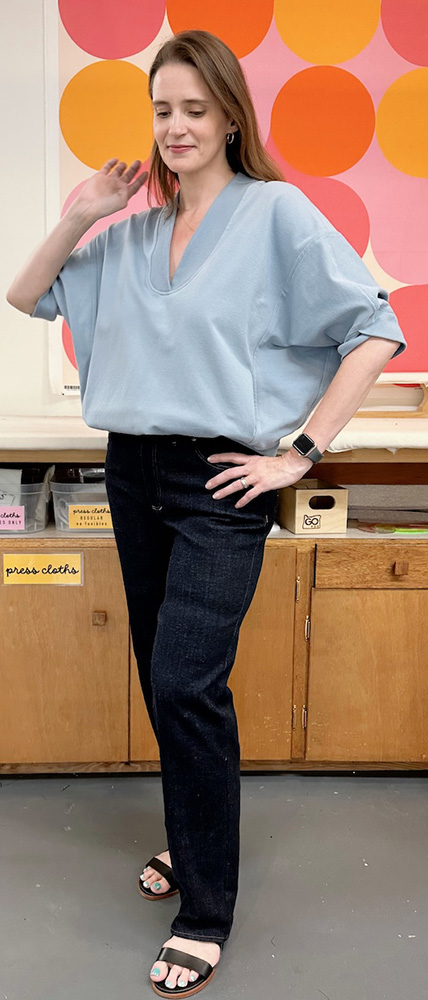
Lyndsey Stanfill teaches Palmer/Pletsch workshops at her sewing school in Louisville, KY. She has taught a class in her studio on making the “Polished Sweatshirt.”
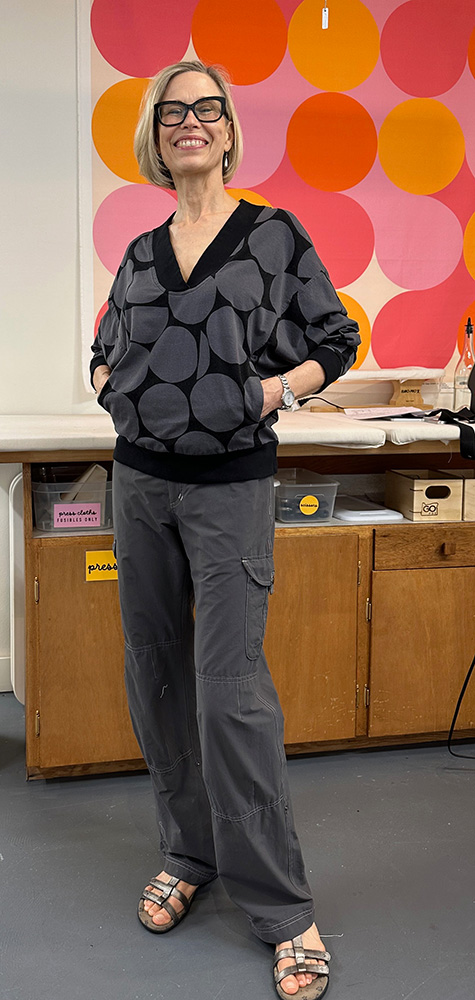
Helen Bartley is wearing her articulated knee hiking pants with cargo pockets featured in her book Fit and Sew Custom Jeans.
THANK YOU HELEN for helping me sew the tops and figuring out the sewing order!
By the way, the others are wearing jeans they made in her jeans workshop.

TIPS FOR FITTING AND SEWING THE COMFY YEAR ROUND POLISHED SWEATSHIRT
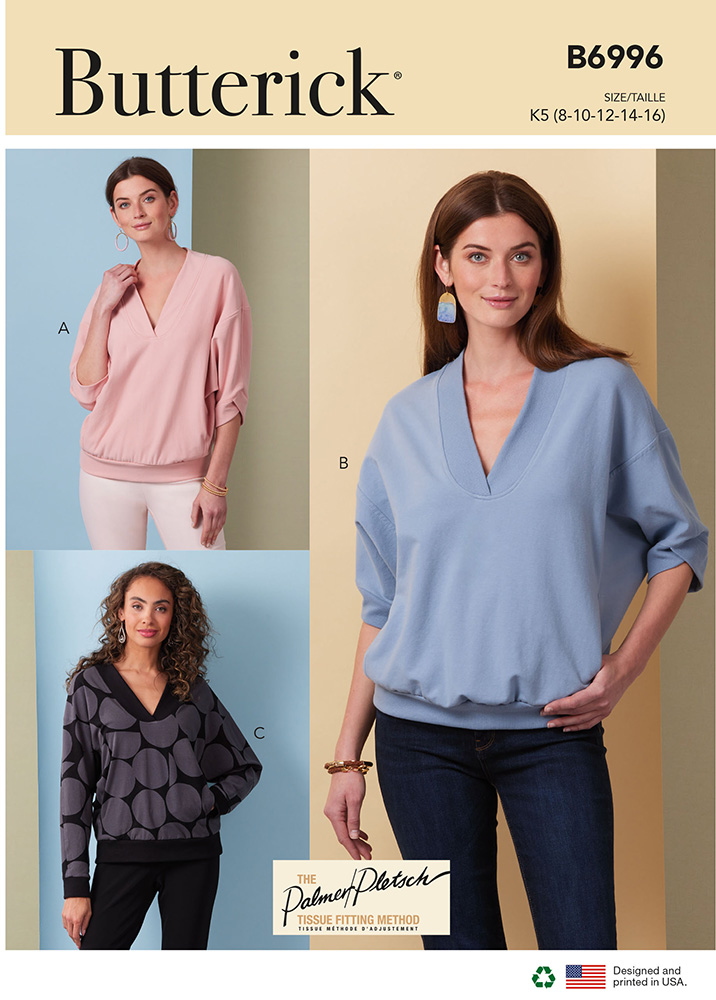
Think work-at-home in style; sheer swim coverup; a French terry sweatshirt fleece; an interlock knit print with contrast bands. The top is oversized with comfy dolman sleeves and “kangaroo” pockets. AND, it is pretty easy to fit and sew. Here is what you need to know.
pattern size
The pattern comes in two size groups, 8-16 and 18-26 with a cut line for each size. It is pretty roomy—if you want it less oversized, consider going down at least one size.
YARDAGE NOTES
All views include self-fabric pockets. If using a lining, see my pocket notes for yardage.
The yardage for each view is different because of sleeve length and fabric used for the bands.
View A (pink) has self fabric bands.
View B (blue) has matching ribbing for bands.
View C has long sleeves and contrast ribbing bands.
KANGAROO POCKET BAG NOTES
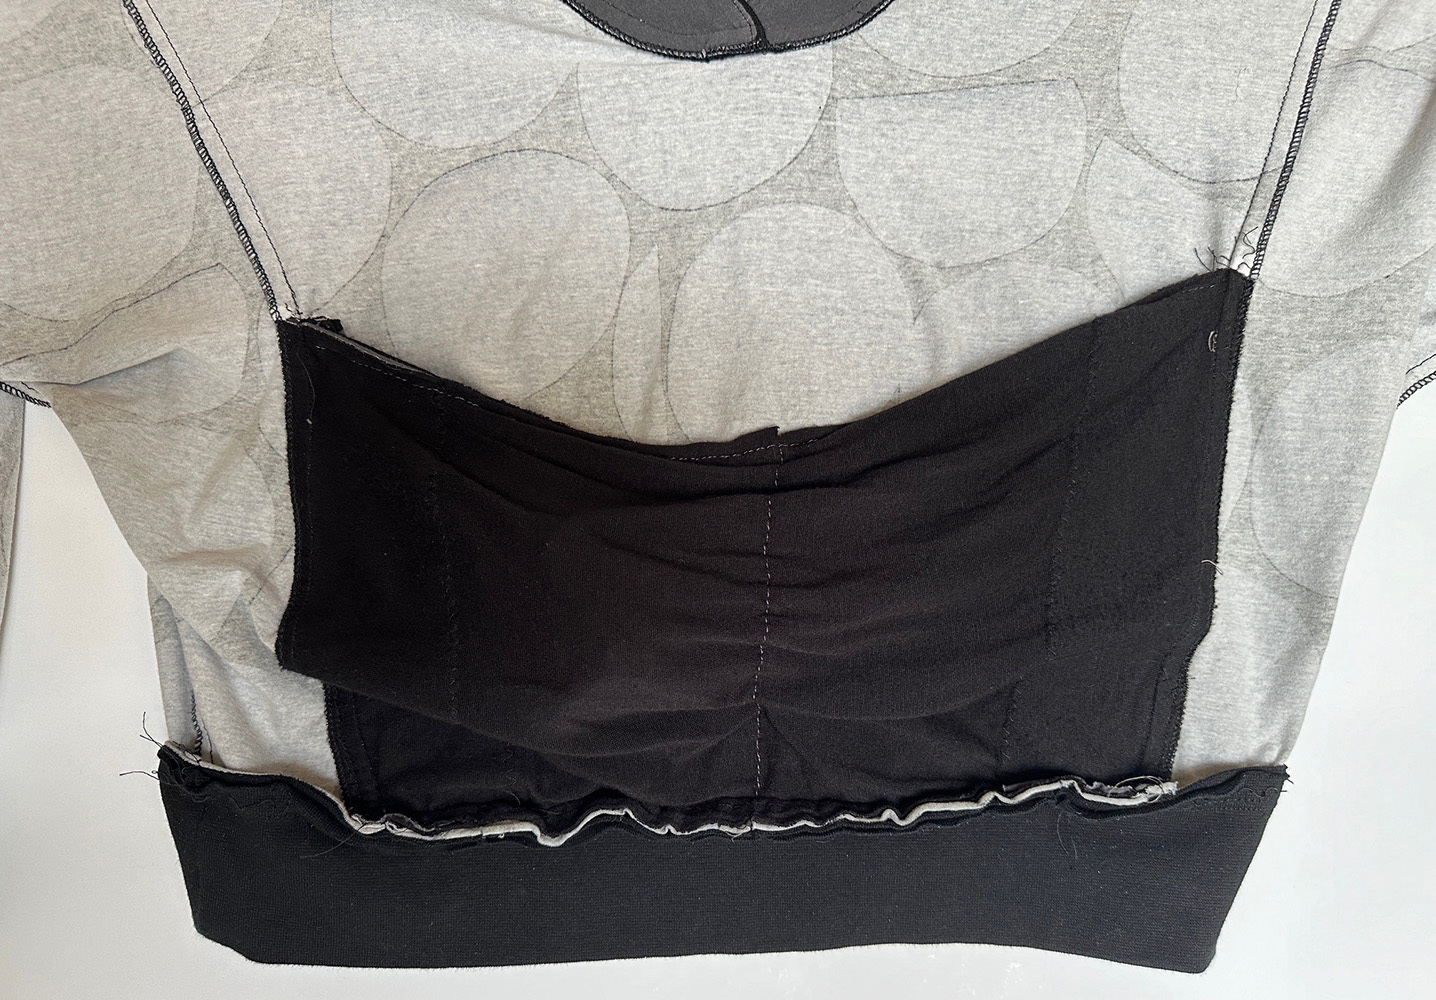
You may use self-fabric if it is not too bulky. Sew a seam through three layers and press to one direction and topstitch. If too bulky substitute one or both pocket bags for a lighter weight fabric such as a lightweight knit like a jersey. You will need 1/3rd yard for both bags or two pieces of knit 11” X 18” from your stash. Further down in the blog I show the various fabrics I tested for pocket bags in these sweatshirts and the results.
STABILIZING POCKETS
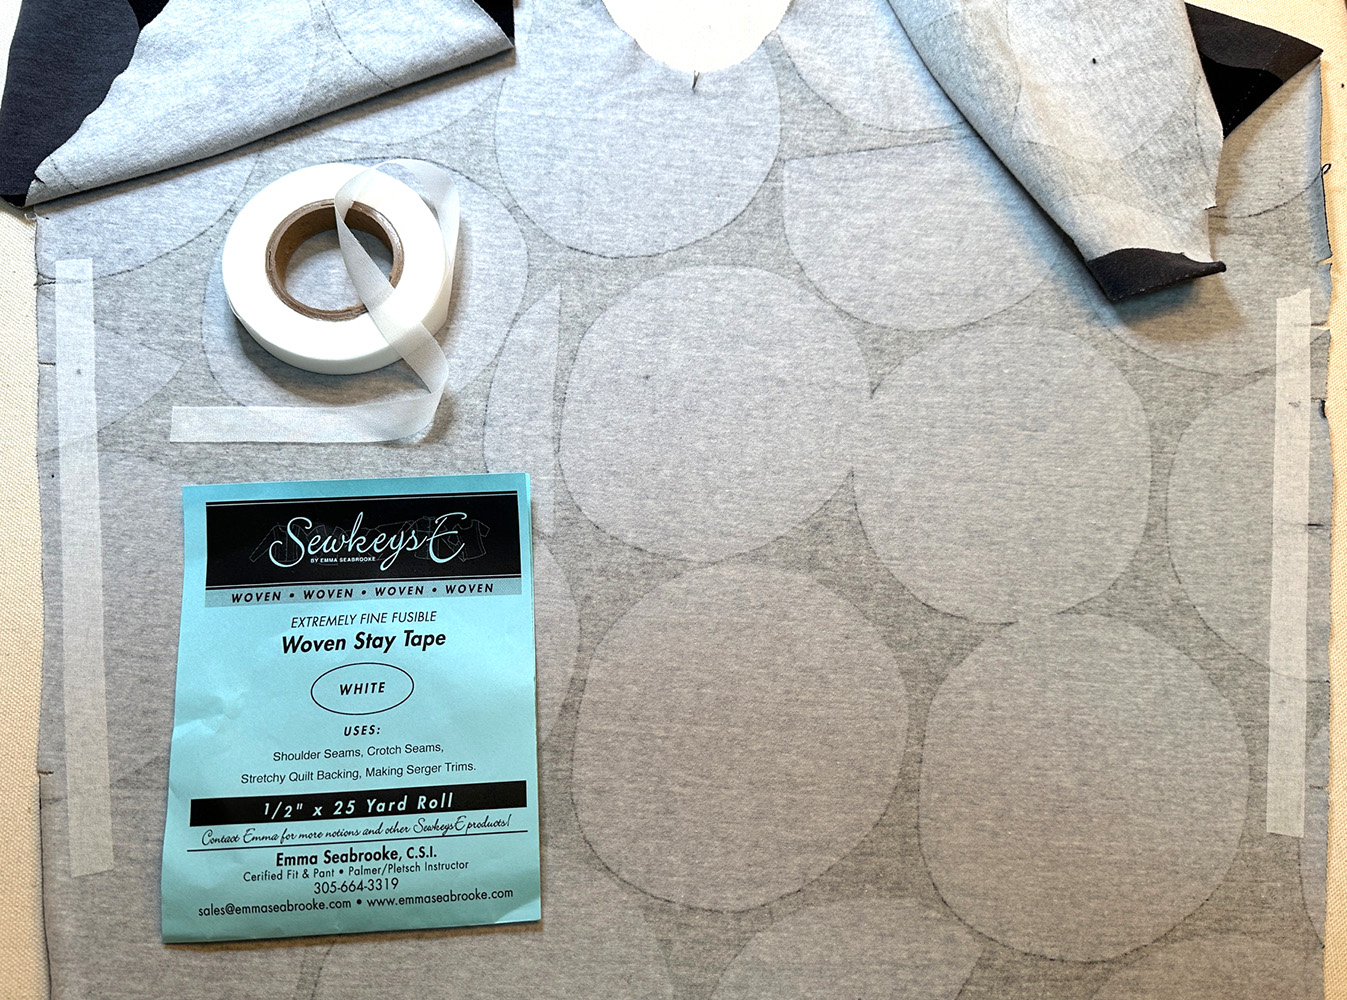
The pocket openings need stabilizing. Fuse 1/2” SewkeysE Woven Stay Tape or a 1/2” wide lengthwise strip of PerfectFuse Sheer interfacing to the wrong side centered over the seamlines between pocket circles on front and side fronts. Staystitch 1/2” from edge and from 1/2” above and below pocket openings.
NOTE: The neckline will be stabilized by the band and the topstitching.
TOPSTITCHING TEST SAMPLE
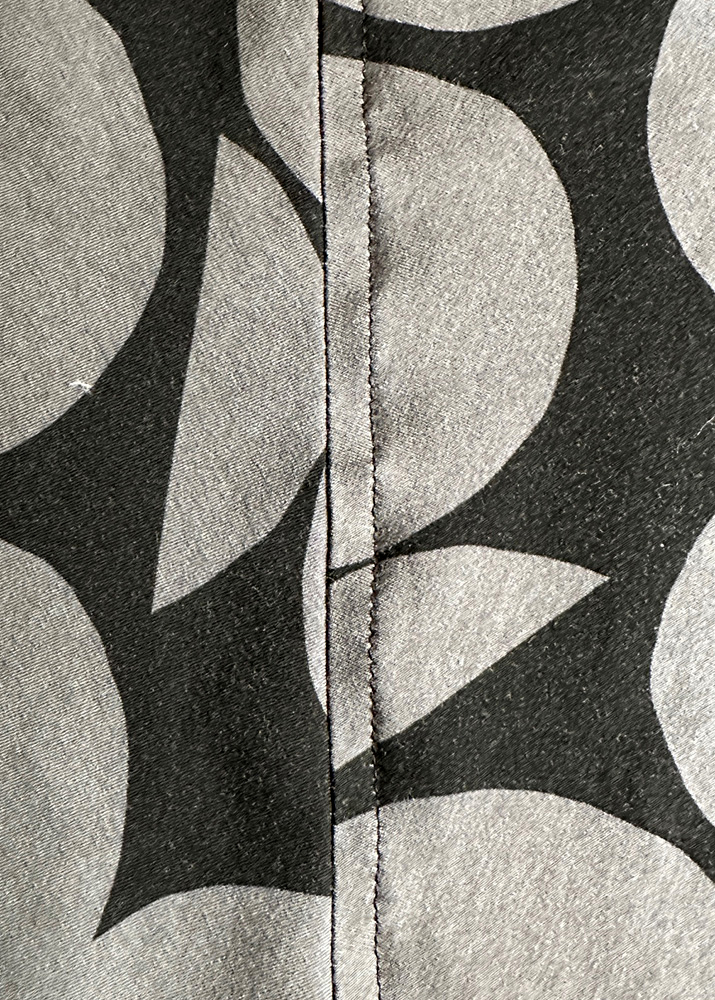
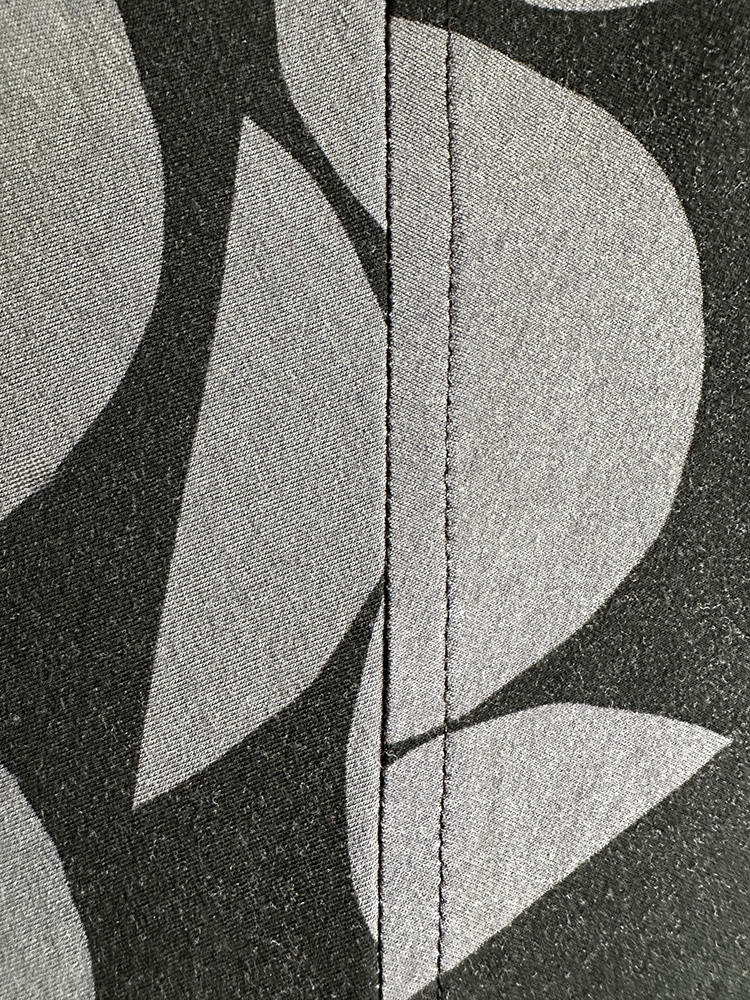
Almost every seam is topstitched, so get it right before you start. Make a test sample. Sew a seam. Press seam allowances toward one side and serge, trimming 1/8-1/4” off edge. Topstitch 1/4” from seam with a 3.5mm stitch length.
Test stitch lengths 3mm up to 4.5 mm.
Rule: the thicker the fabric the longer the stitch. When you cross a topstitched seam, stop and lengthen stitch where you cross. If you have puckers, press lightly.
SLEEVE LENGTH
Pin cuff to sleeve. We like the cuff to be is just below the elbow for 3/4-length sleeves. Lengthen or shorten sleeve as needed.
BODY LENGTH
Body length is 2” longer in the front than the back. This allows for blousing when putting hands in the kangaroo pocket. Lengthen or shorten pieces 1,2,5, and 6.
LOWER BAND FITTING
Self fabric lower bands may stretch more than ribbing. I don’t know a better way to fit other than basting the band to the bottom of the top and trying on. Adjust if needed.
NECKLINE
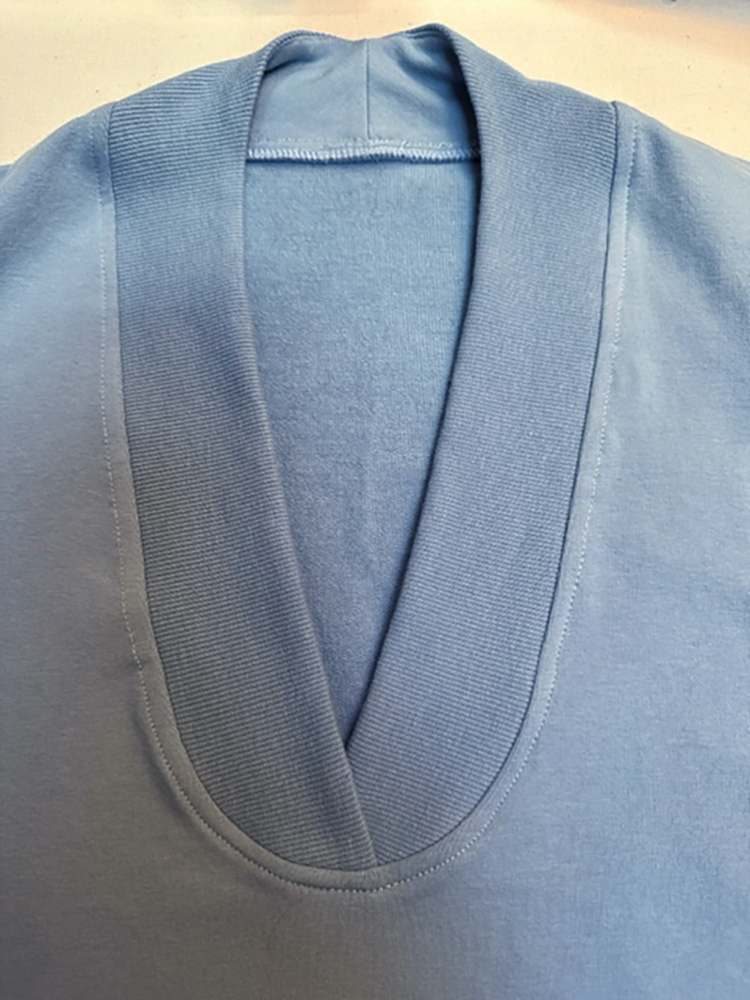
Try on the tissue and place the 2”-wide band on the front lapping seamlines. If the neckline is too low decide how much higher you want it. Raise the front neckline by adding tissue and remove the same amount with a tuck in the lower band.
shoulder seam
Because the shoulder seam sits toward the back in this loose-fitting top we didn’t address shoulders.
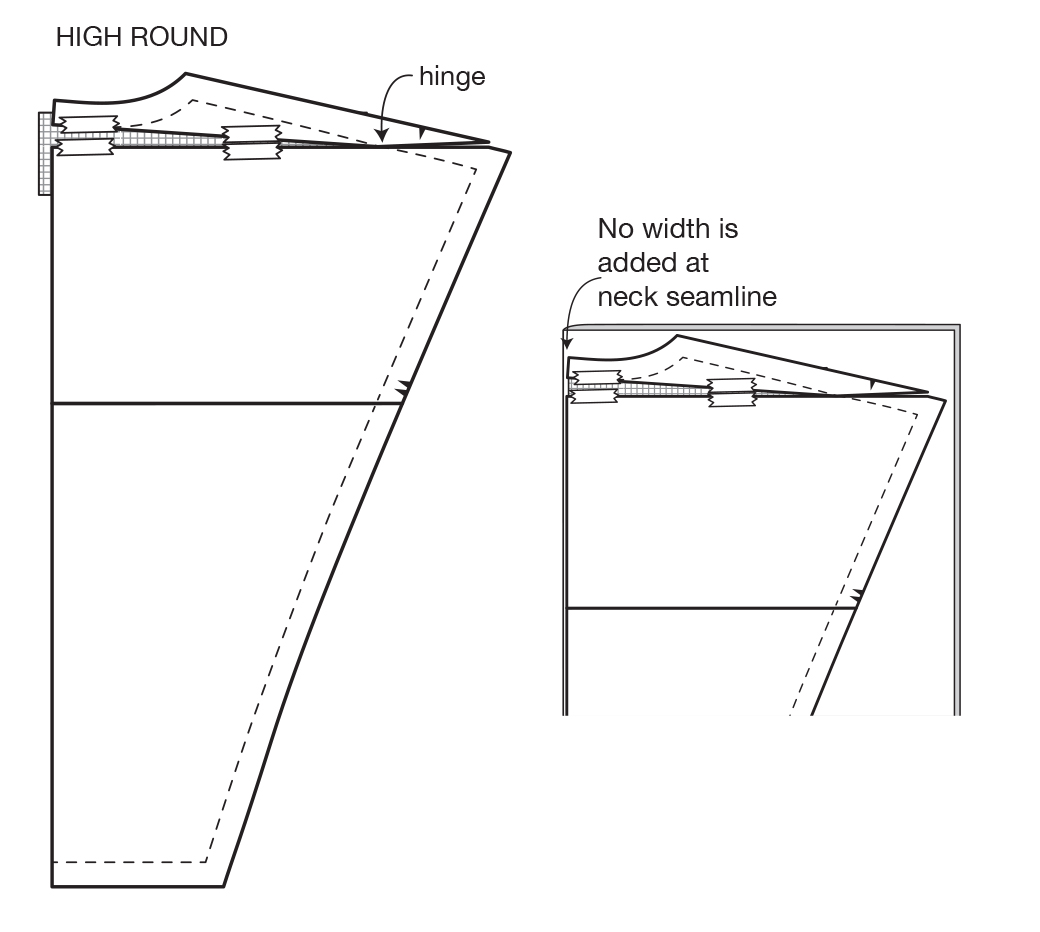
HIGH ROUND BACK
If you normally raise the back neck do the alteration on this top. Draw a line from center back neck seam to shoulder. Cut and raise center back 1/4” to 5/8”.
If you are very rounded in the back and need more than 5/8” in length, follow the low round back alteration steps in the guide.
BUST
Like all Palmer/Pletsch patterns, we suggest tissue-fitting even though this top is oversized. Most full-busted people won’t need an FBA (full bust adjustment). However, the alteration lines are on the tissue and the how tos in the guide if needed.
NOTE: If width is good but the front hikes up due to a full bust you could add at the bottom of the center front and taper to nothing at the sides.
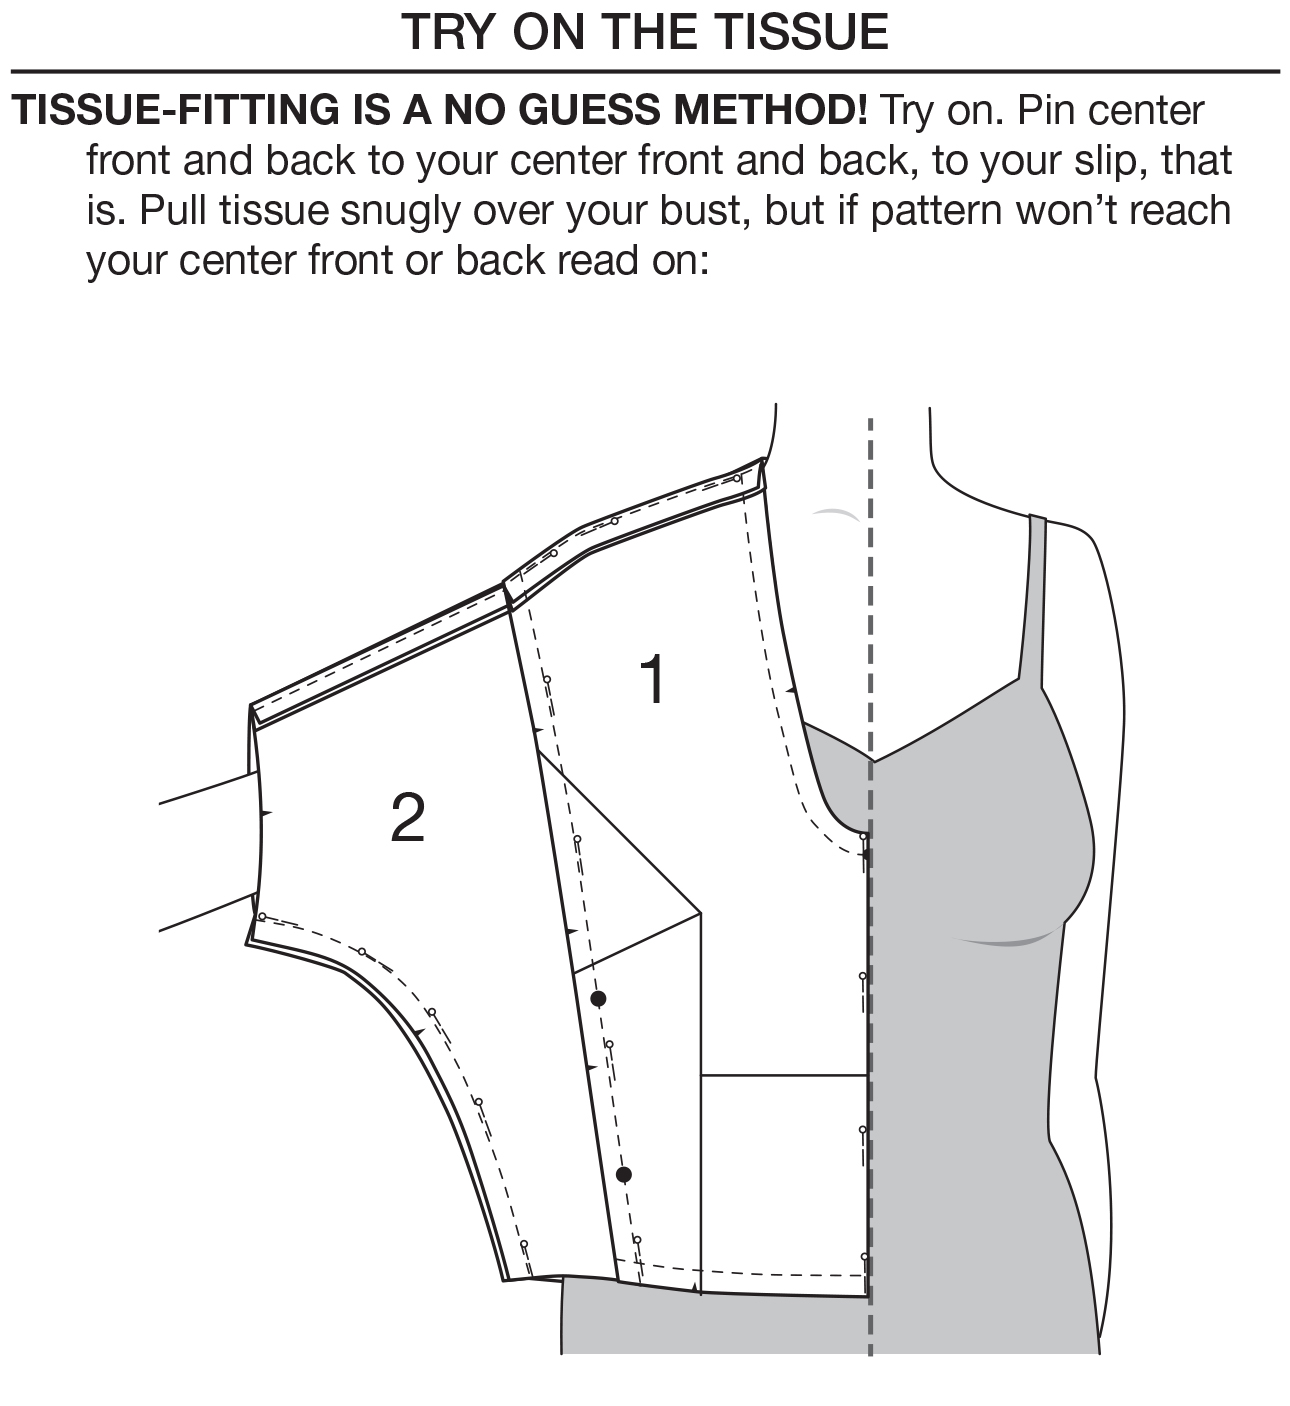
NOTE: Drag lines pointing to the bust are caused by the kimono sleeves. When arms are down the excess fabric points to the bust.
THE NECK BAND
Remember to check neckline depth. Where do you want the top of the V to be on your body? See the previous fit tip. Sew the center back seam in the band and band facing. Trim seam and understitch through band facing and seam allowances. Press rolling the seam toward the facing so it doesn’t show. If the fabric is thick, the facing may be larger than the band. Trim the excess facing away!
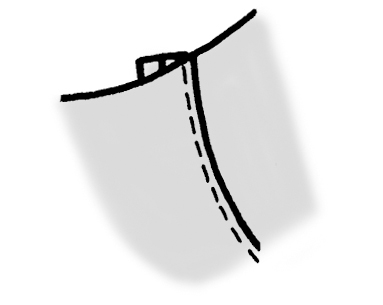
Understitch through facing and seam allowances from the right side.
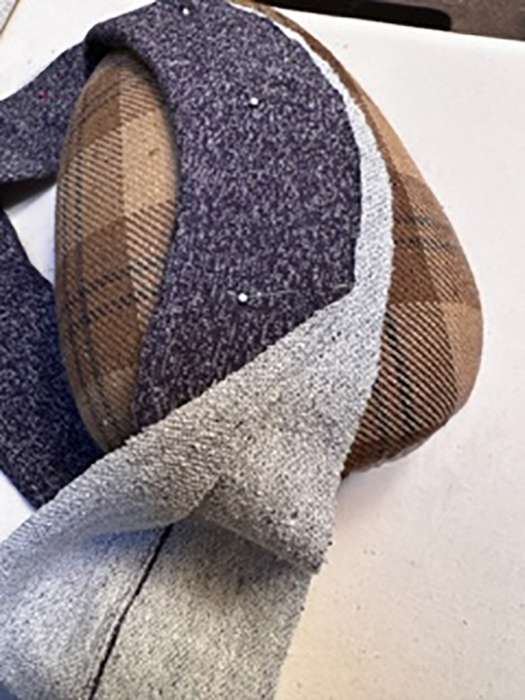
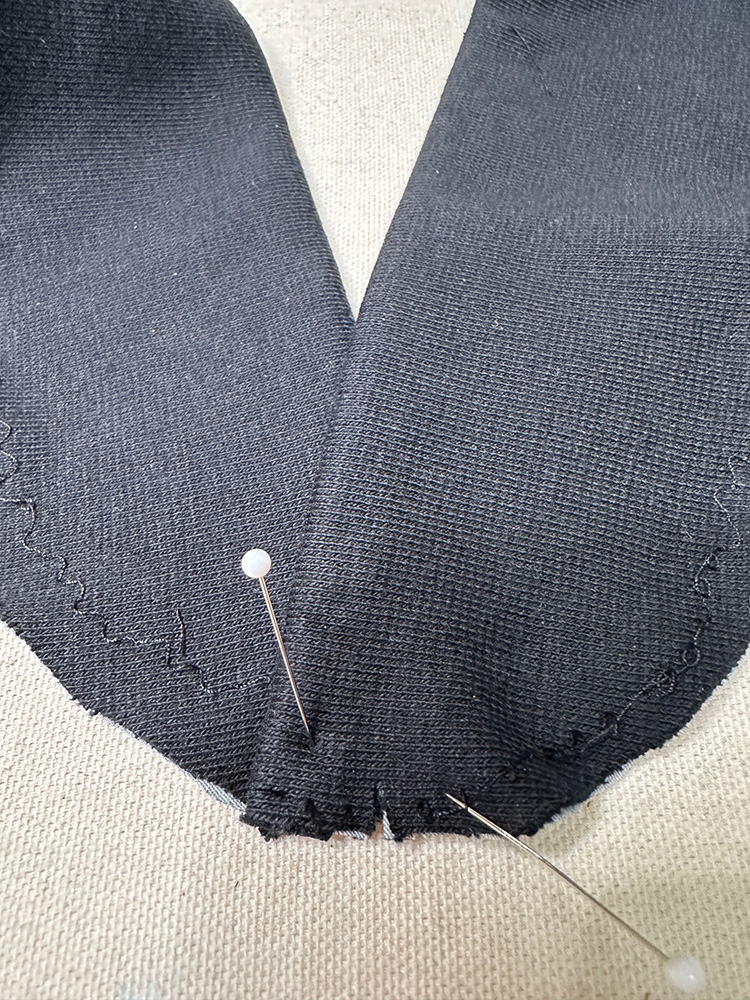
check band fit
Match the CF snips, then pin. Try on to check depth. You could lap the ends a little more or less if needed.
RIBBING TIP
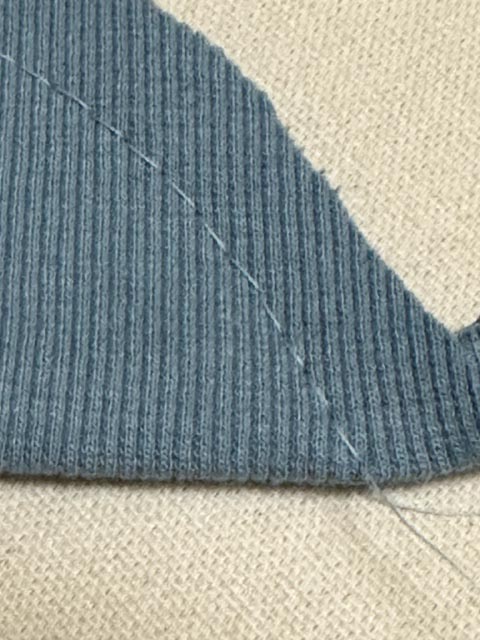
I used matching ribbing for the blue sweatshirt band and self fabric for the facing. The seam stretched when I understitched the seam allowances to the facing side.
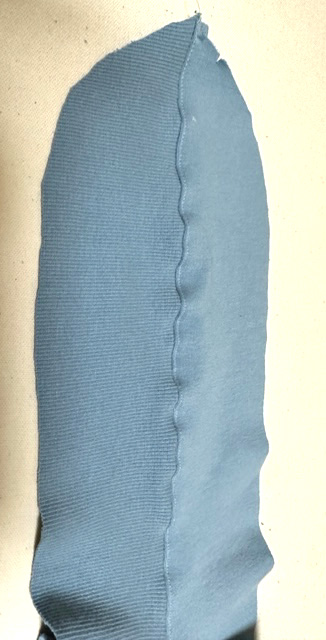
No worry. Right sides together lightly press the edge. Let it cool. It will ease in.
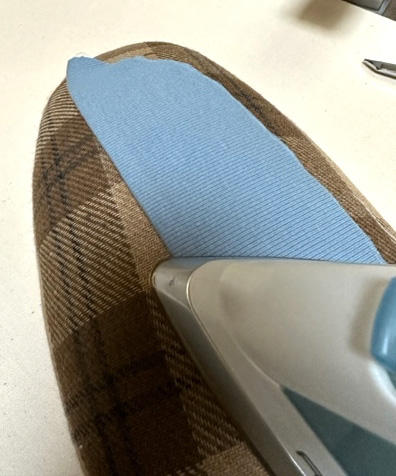
With a long basting stitch, baste raw edges together.
ATTACHING NECK BAND
Pin band to neck right sides together. If you’ve snipped CB and CF and the notches, match them. The band is stretched to fit the neck in the curved areas. I pinned in the seam line parallel to the edge and checked it from the right side. Then I machine basted all but the lower third making it easier to slip on and see how the band looked.
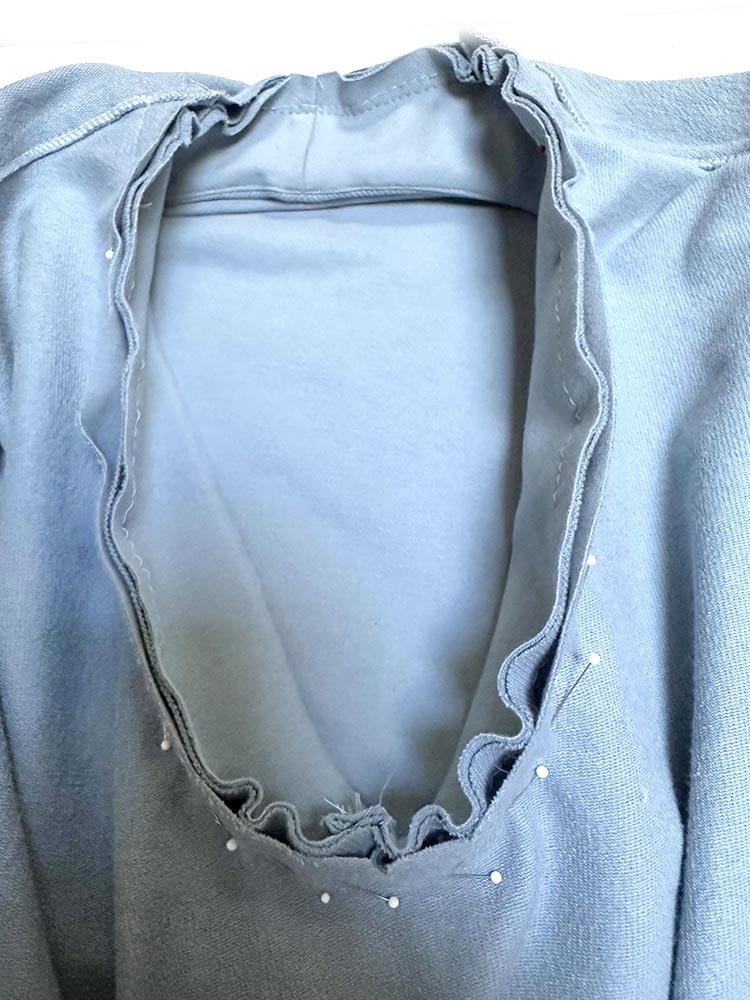
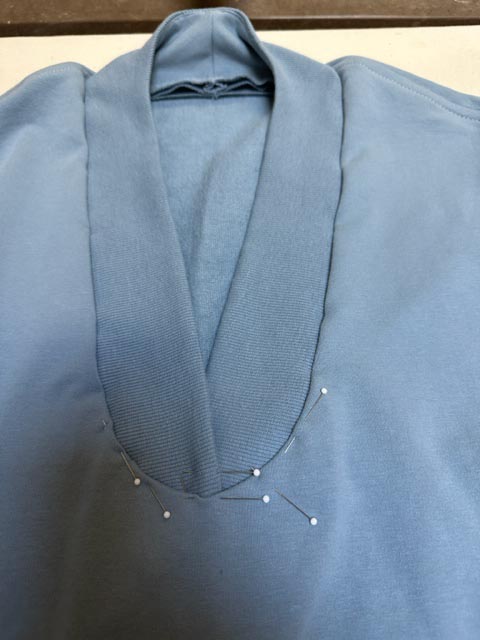
From the right side I hand slip stitched in the fold where it was not basted and removed pins to sew. Your seam allowance may end up deeper or shallower. It’s OK if needed to make the band fit smoothly.
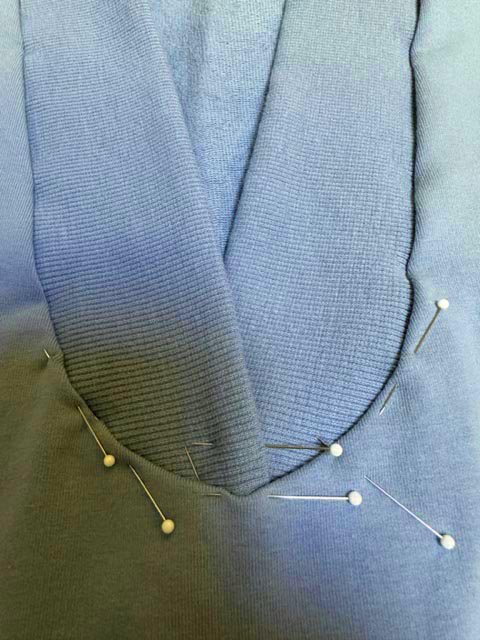
When everything looked good I permanently sewed the band. To finish I serged the seam allowance to 3/8” or a little larger, then topstitched 1/4” from the seam. Don’t serge narrower than 3/8” or you won’t catch the seam allowances.
CUFFS—TIPS FOR THE TRICKY PARTS
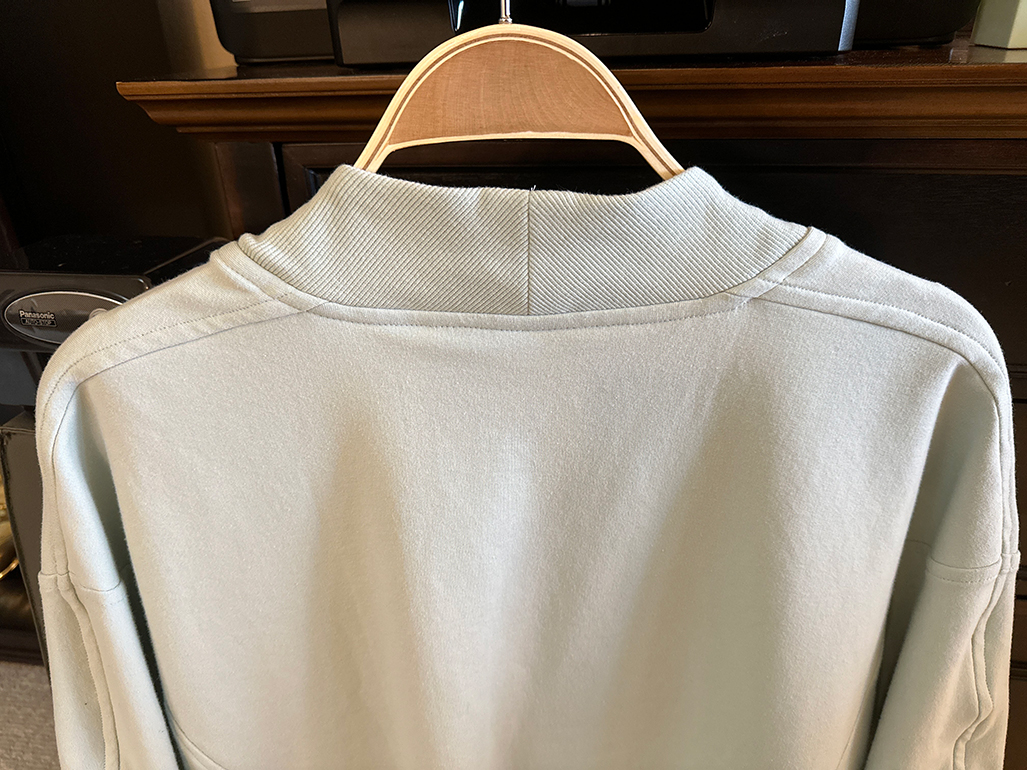
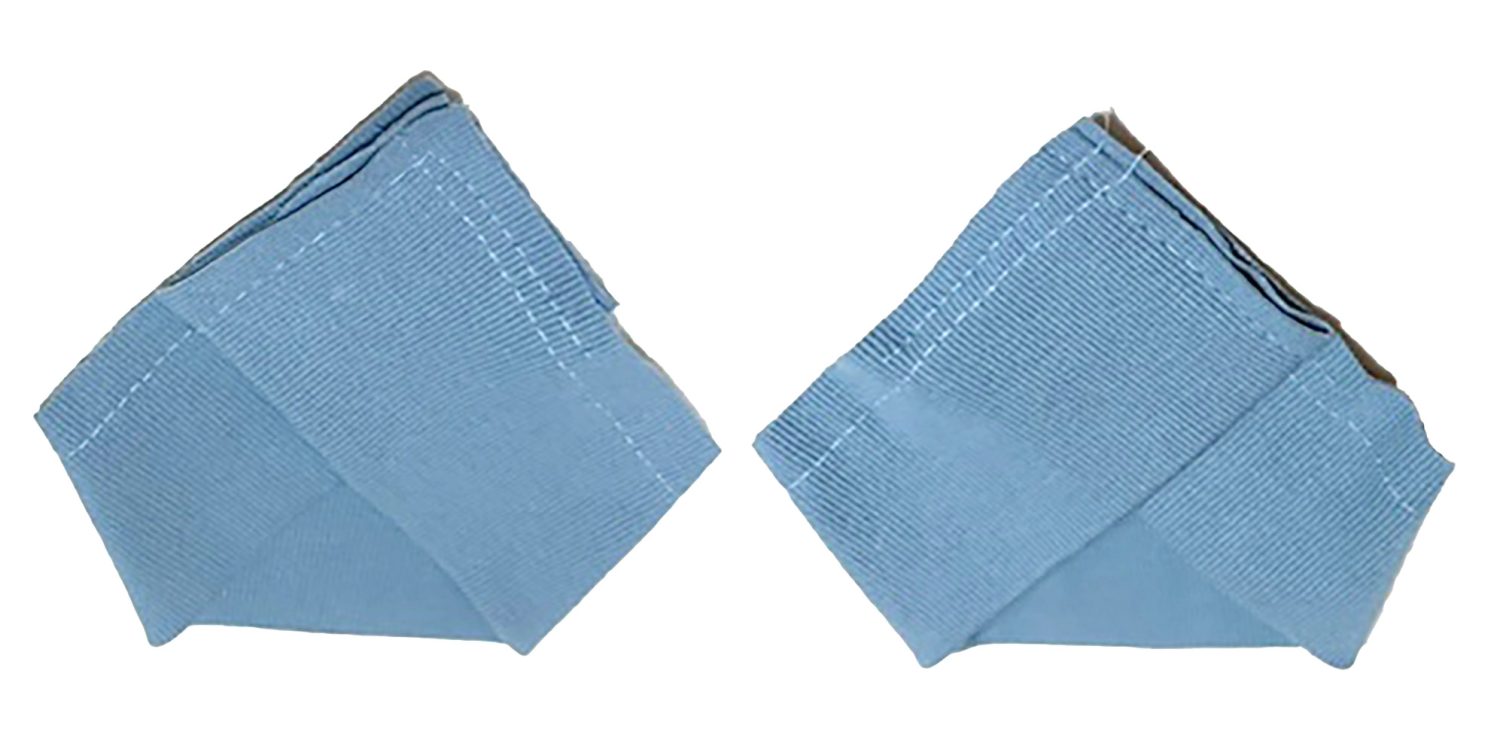
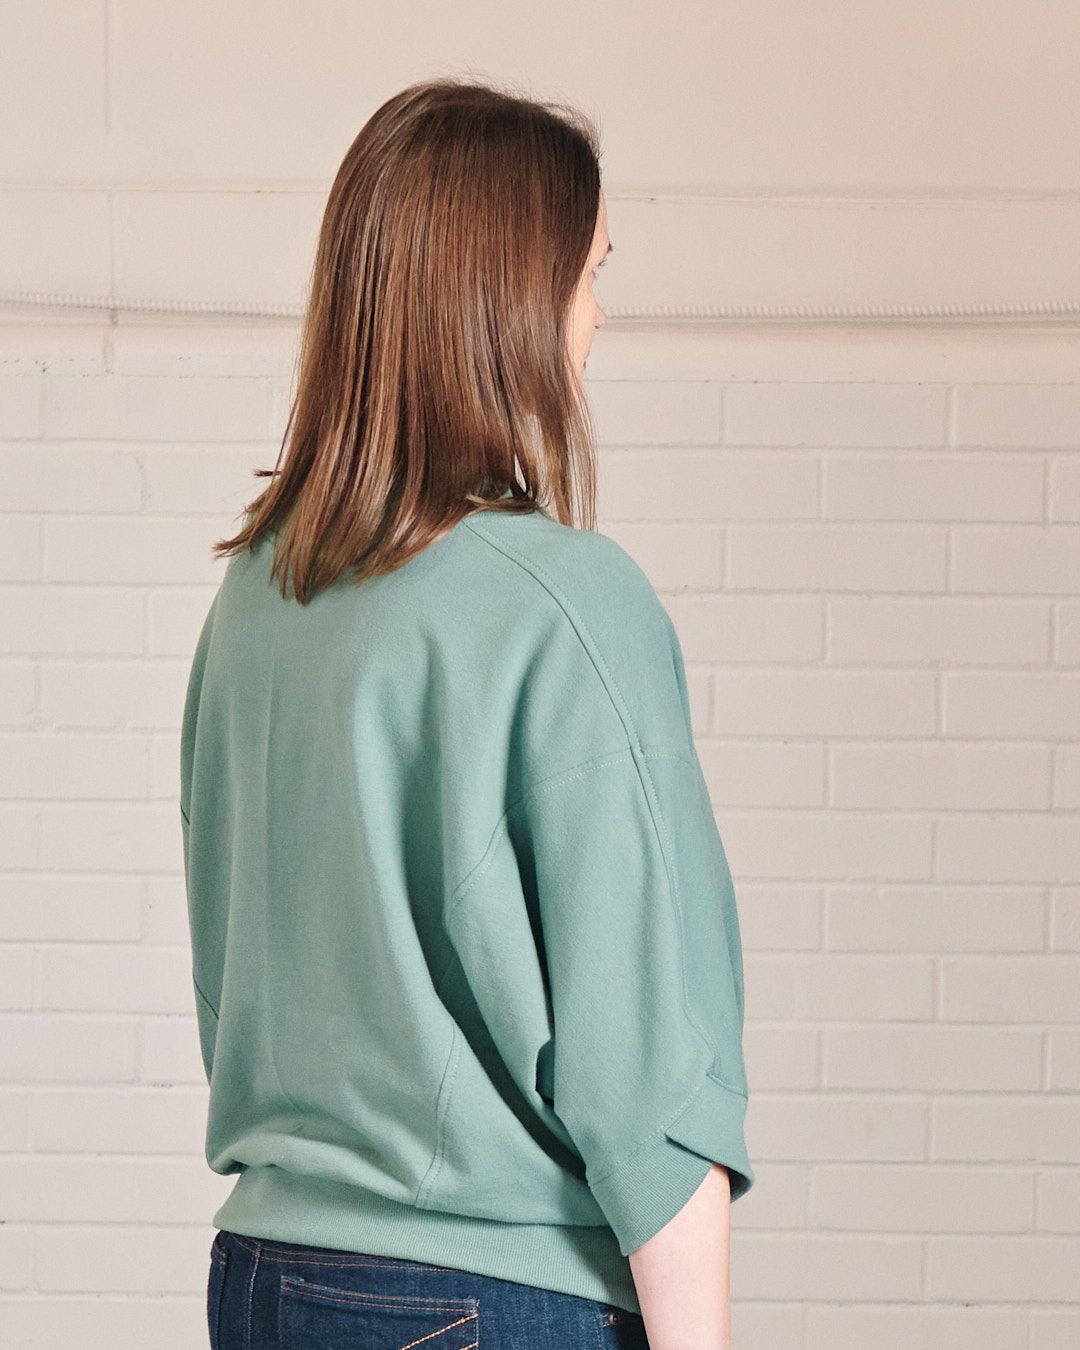
From the back you can see that the cuffs wrap back over front. So place them on the table and lap with right sides out to look like the photo of my top. Baste raw edges together. Would it help to put a note on each LEFT and RIGHT??? Probably a good idea.
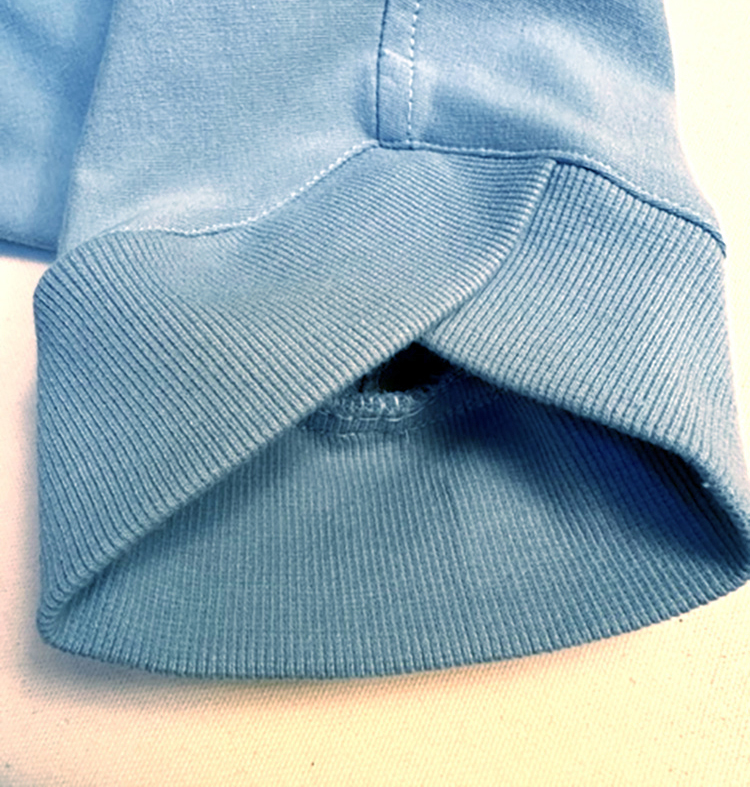
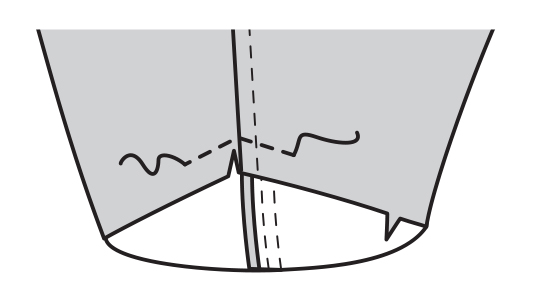
The upper arm/shoulder seam makes a V at the lower edge and is a little tricky. To make it easier, staystitch on the seamline and clip to stitching.
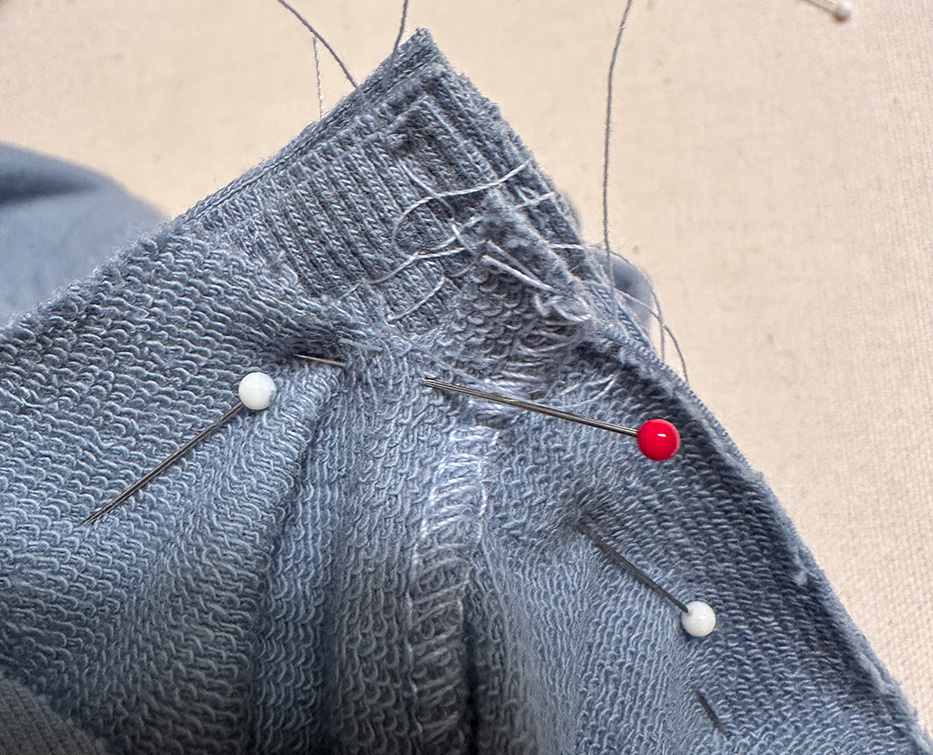
Pin cuff to sleeve matching the snip to the cuff point. Pin on staystitching so you can catch the sleeve before pivoting to sew the other side of the point.
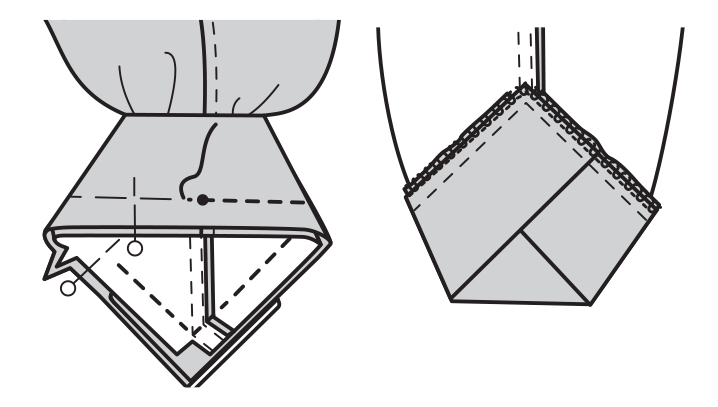
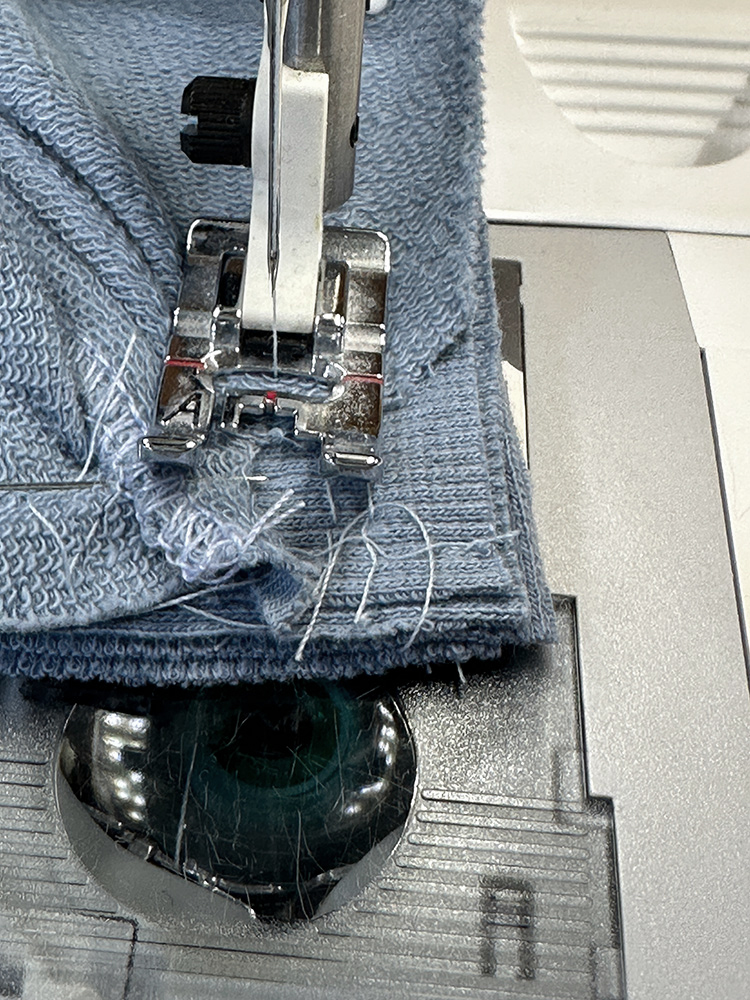
Sew toward point. Stop at the snip. Lower the needle. Pivot and stitch the other side.
Press the seam allowance toward the sleeve and edgstitch next to seam from right side.
POCKET CONSIDERATIONS
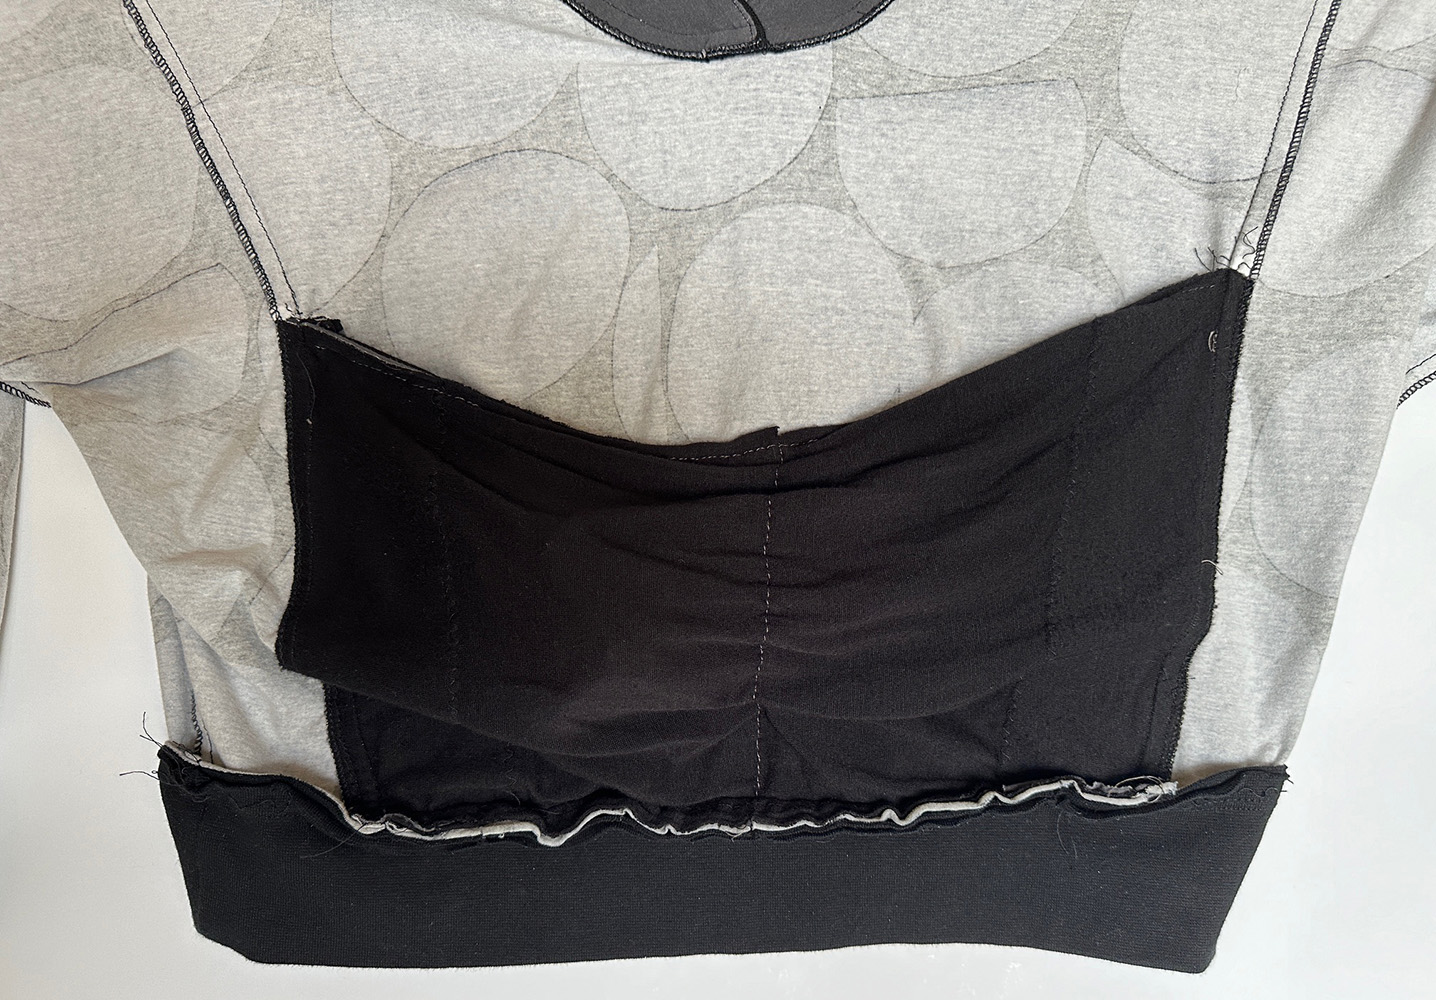
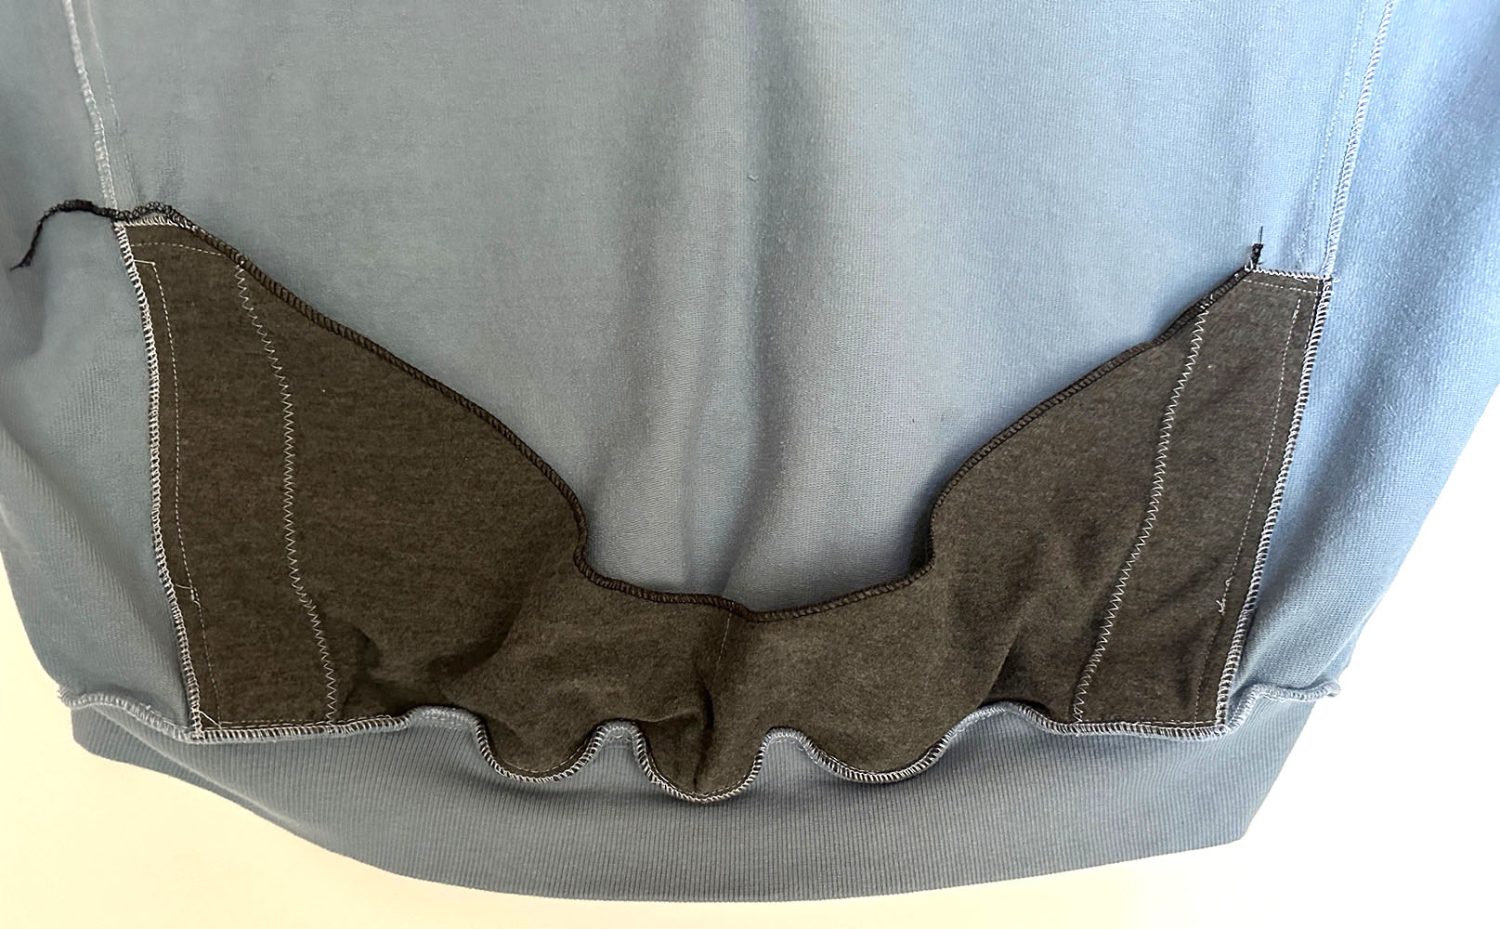
Even though the pocket is the first thing you sew, the photos of the insides of my sweatshirts with my pocket lining experiments is admittedly rather ugly, so I didn’t want to start the blog there. But the outsides are beautiful because the self-fabric facings hide the lining in the pocket opening.
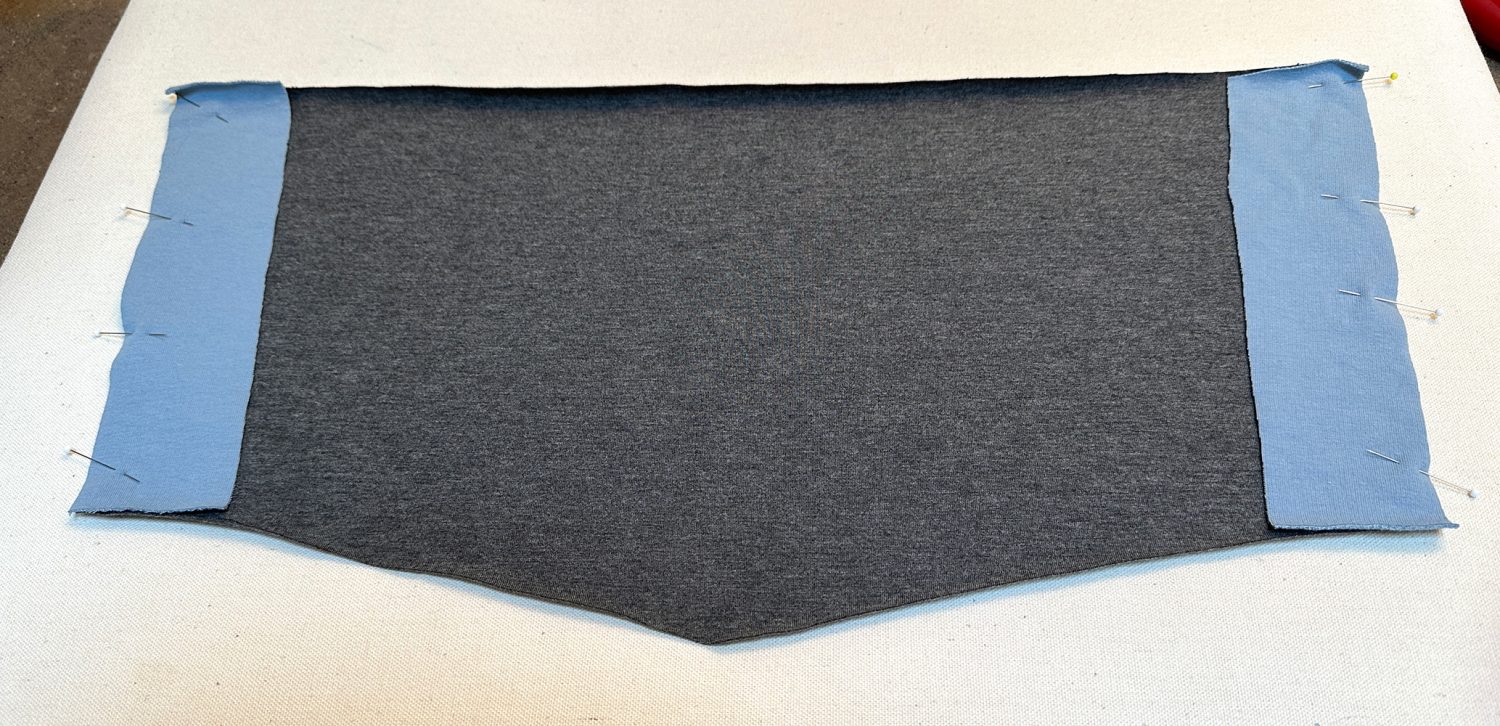
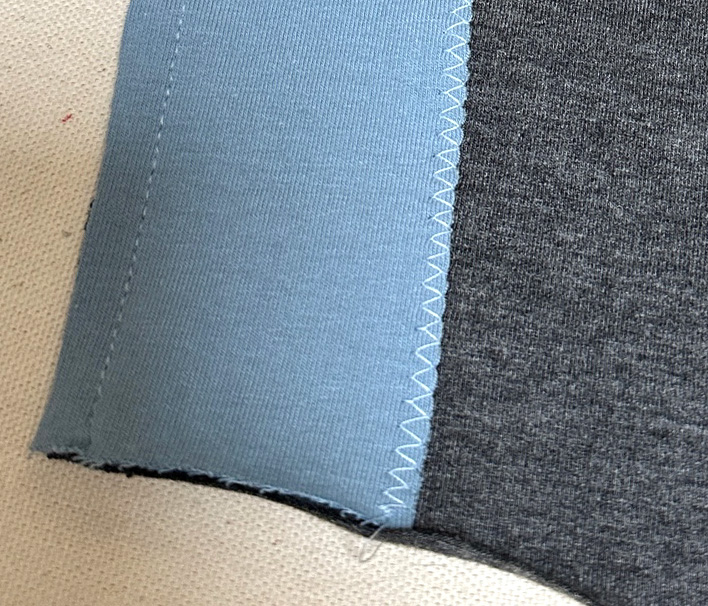
Keep the inside of the facing flat by zigzagging over the raw edge to the lining.
POCKET FABRICS
I had no idea of what to use. So I bought 1/3rd yards of three fabrics and used one from my stash. I figured it should be a knit like the top.
My Favorite!
Lightweight rayon jersey with a soft brushed finish. I preshrunk the fabric. It feels good to my hands when in the pockets.
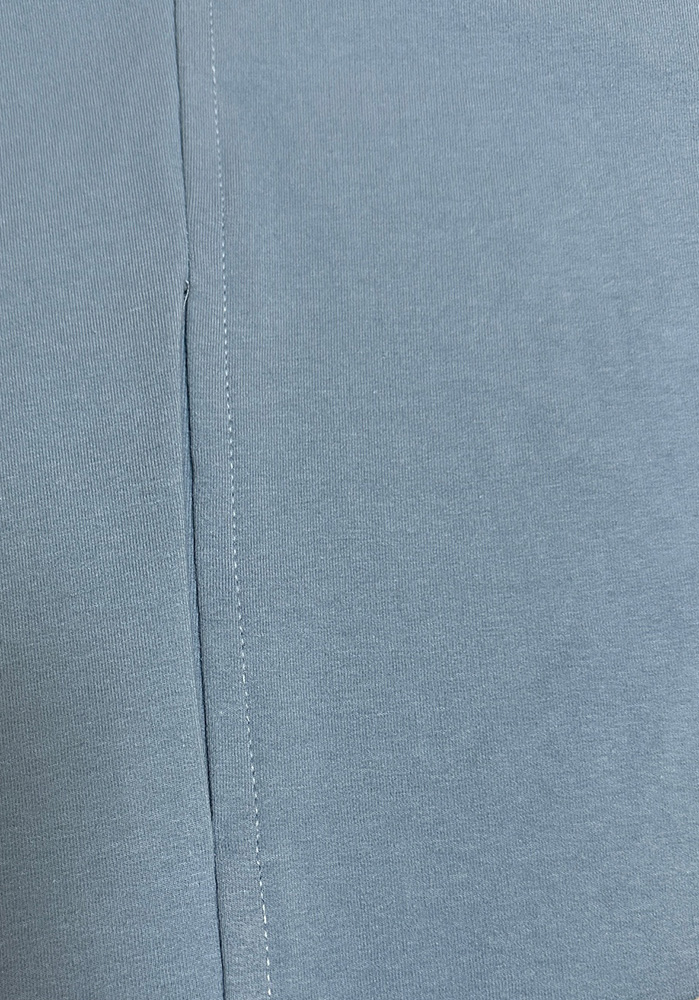
NOTE: The pocket lining layers are sewn together down the middle, creating two pockets.
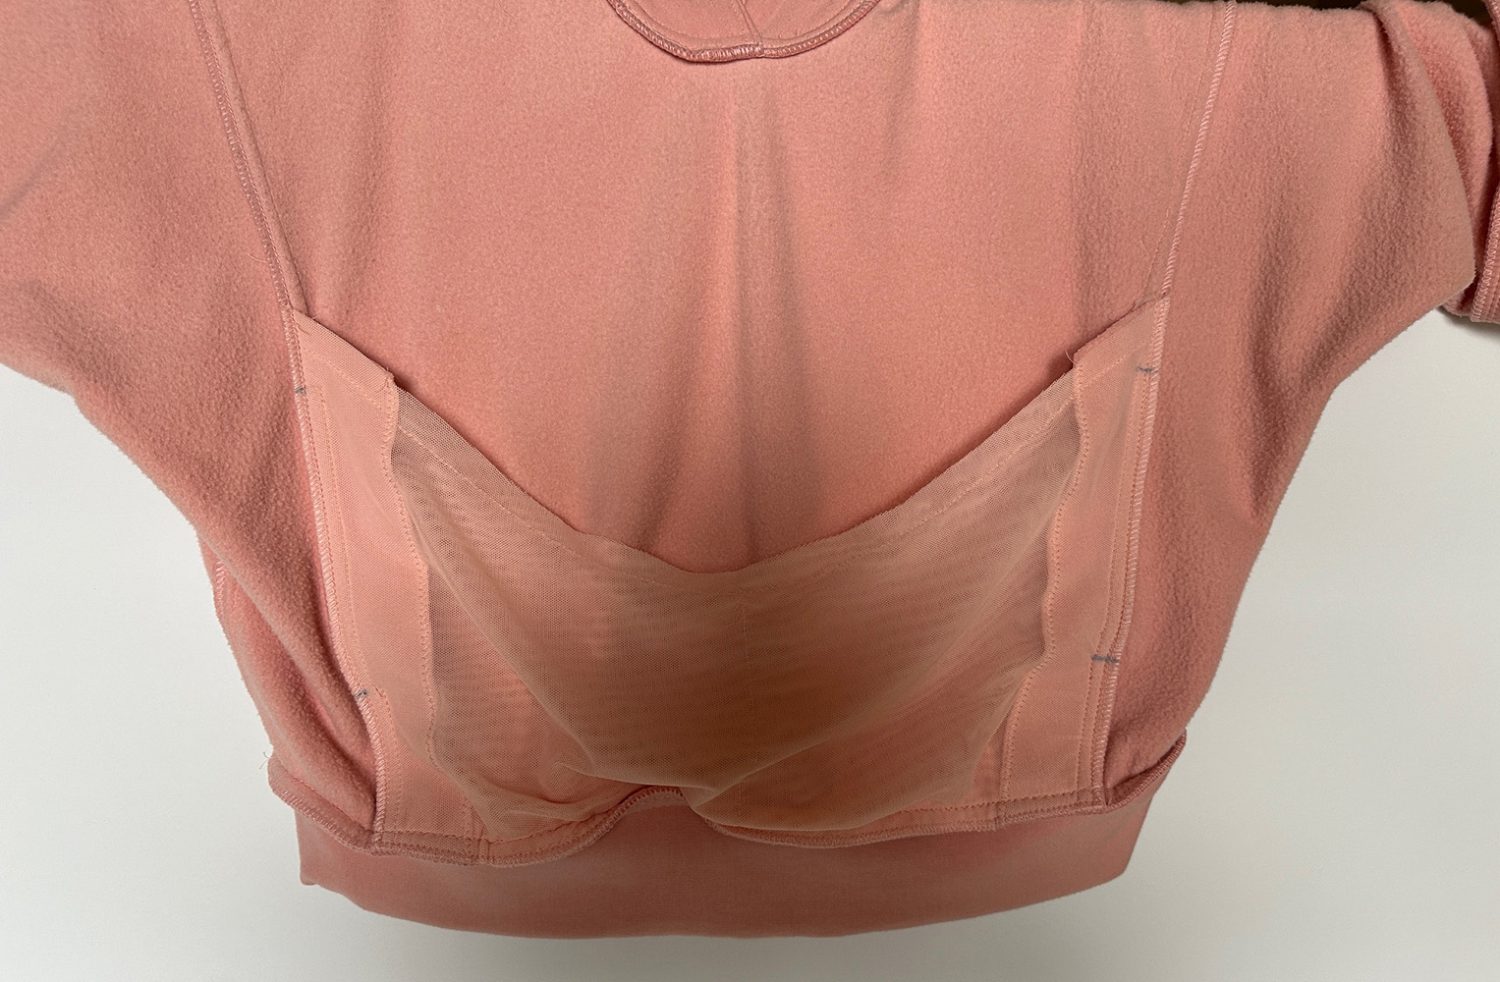
The prettiest!
Polyester mesh is lightweight, washable, and wiggles a lot when cutting and handling. I love that it matches. It doesn’t look quite so ugly!
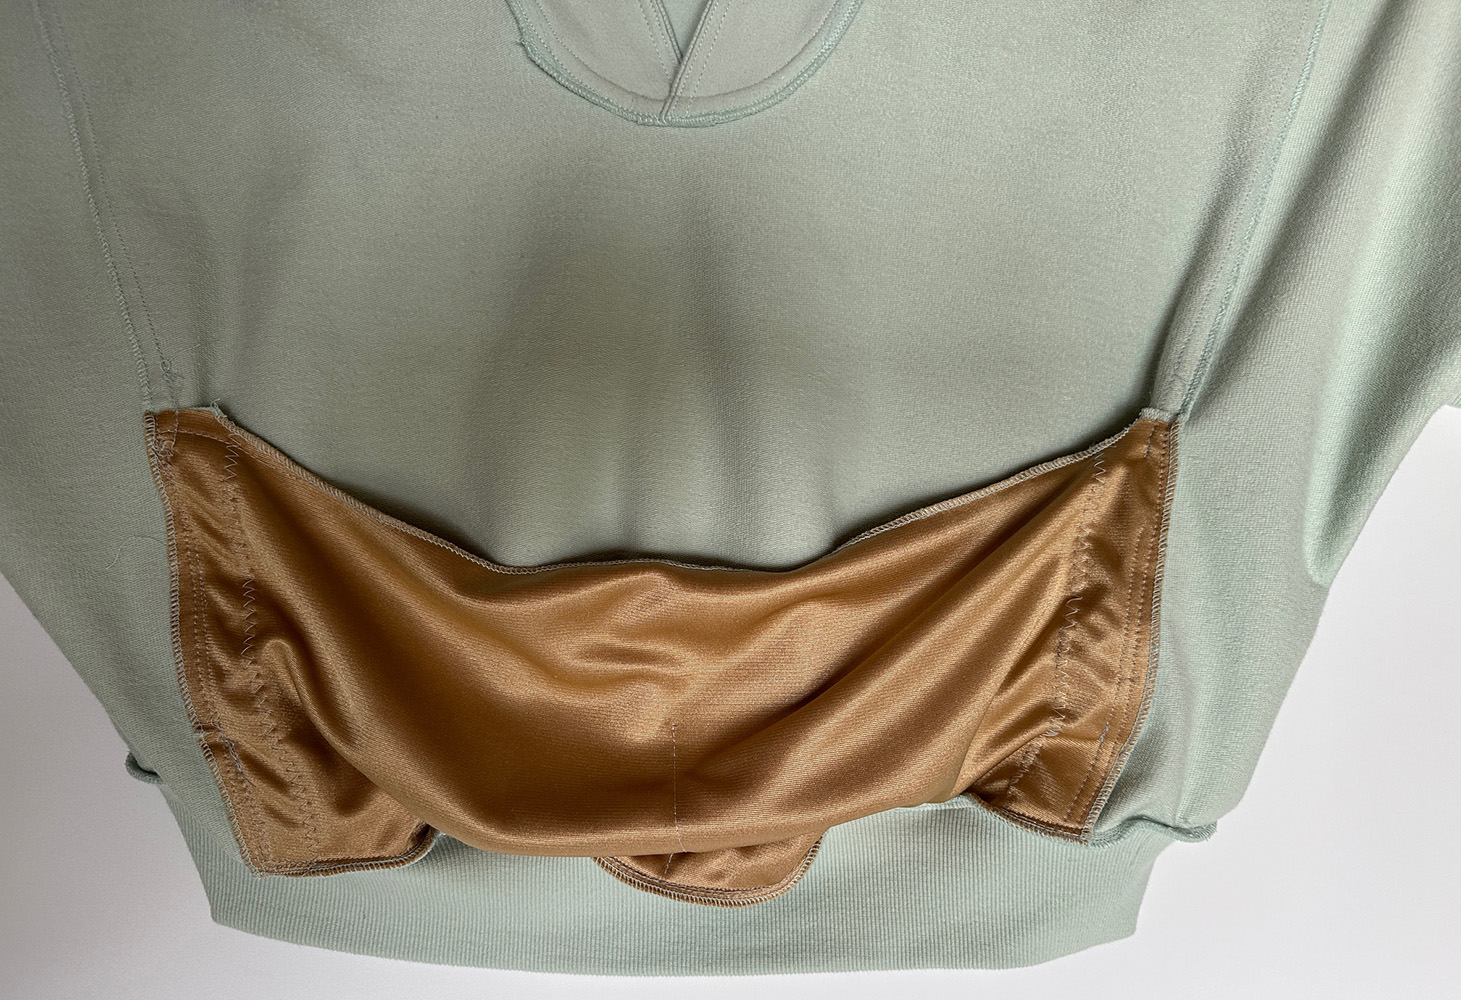
The cheapest!
This was the first top I made and I did not buy pocket fabric. I have a stash! In it I found this 1970s Qiana nylon doubleknit. It didn’t need preshrinking, and though heavier than the others, it didn’t droop too much. It sure feels good.
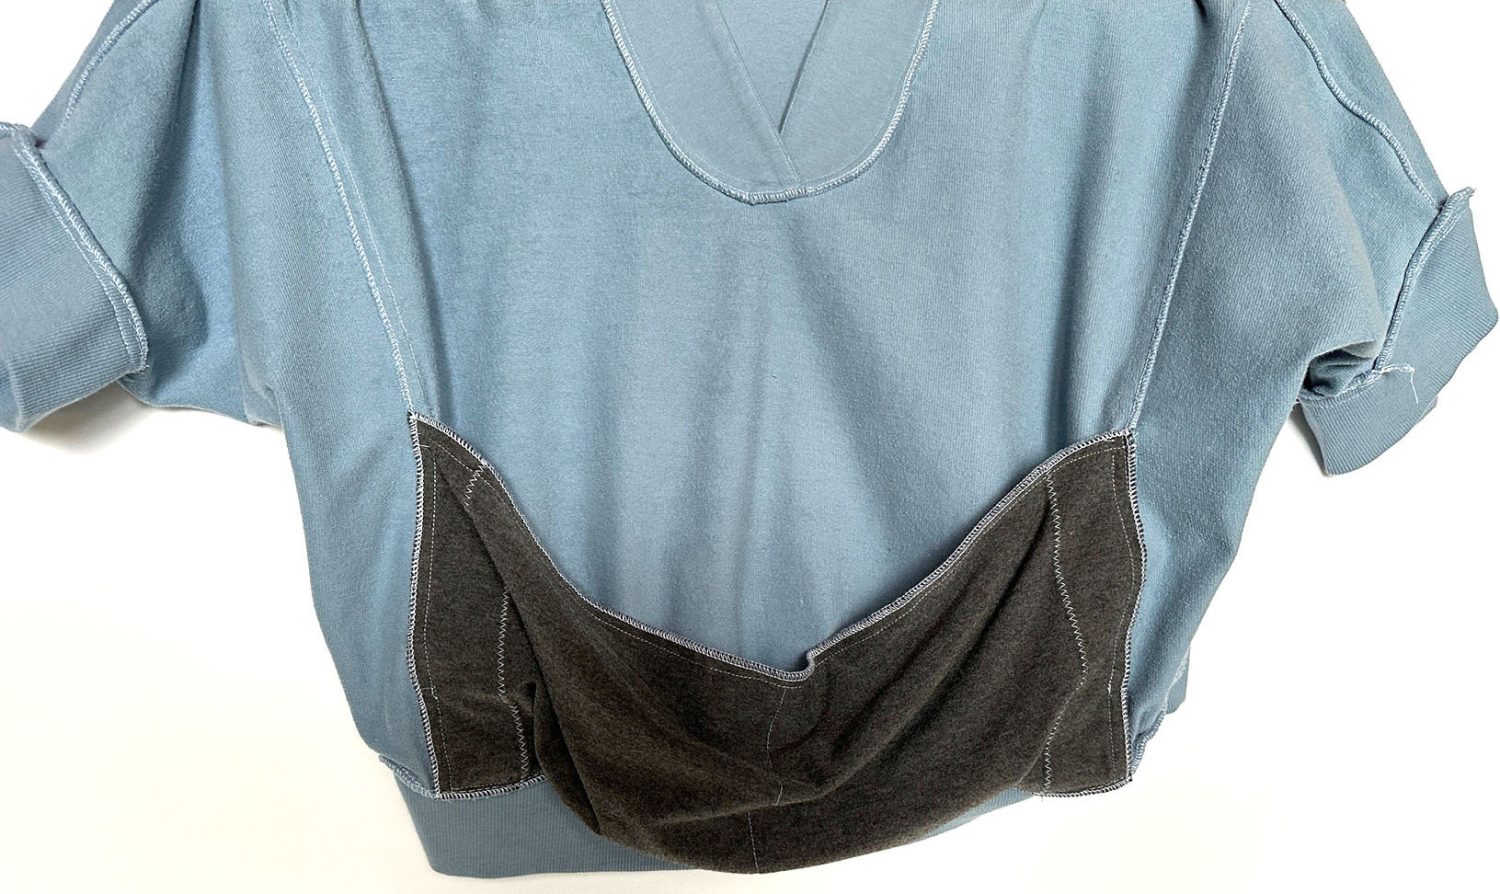
My least favorite!
This is a poly/spandex interlock. It feels good to the hands, sewed easily, but it was a weighty knit and drooped to below the band and showed. Remember, it’s not a sewing disaster if you can fix it! I needed to make the center lighter in weight!
I smoothed out the pocket and chalked a line where I would sew it lower at the CF leaving room for my hands at the sides.
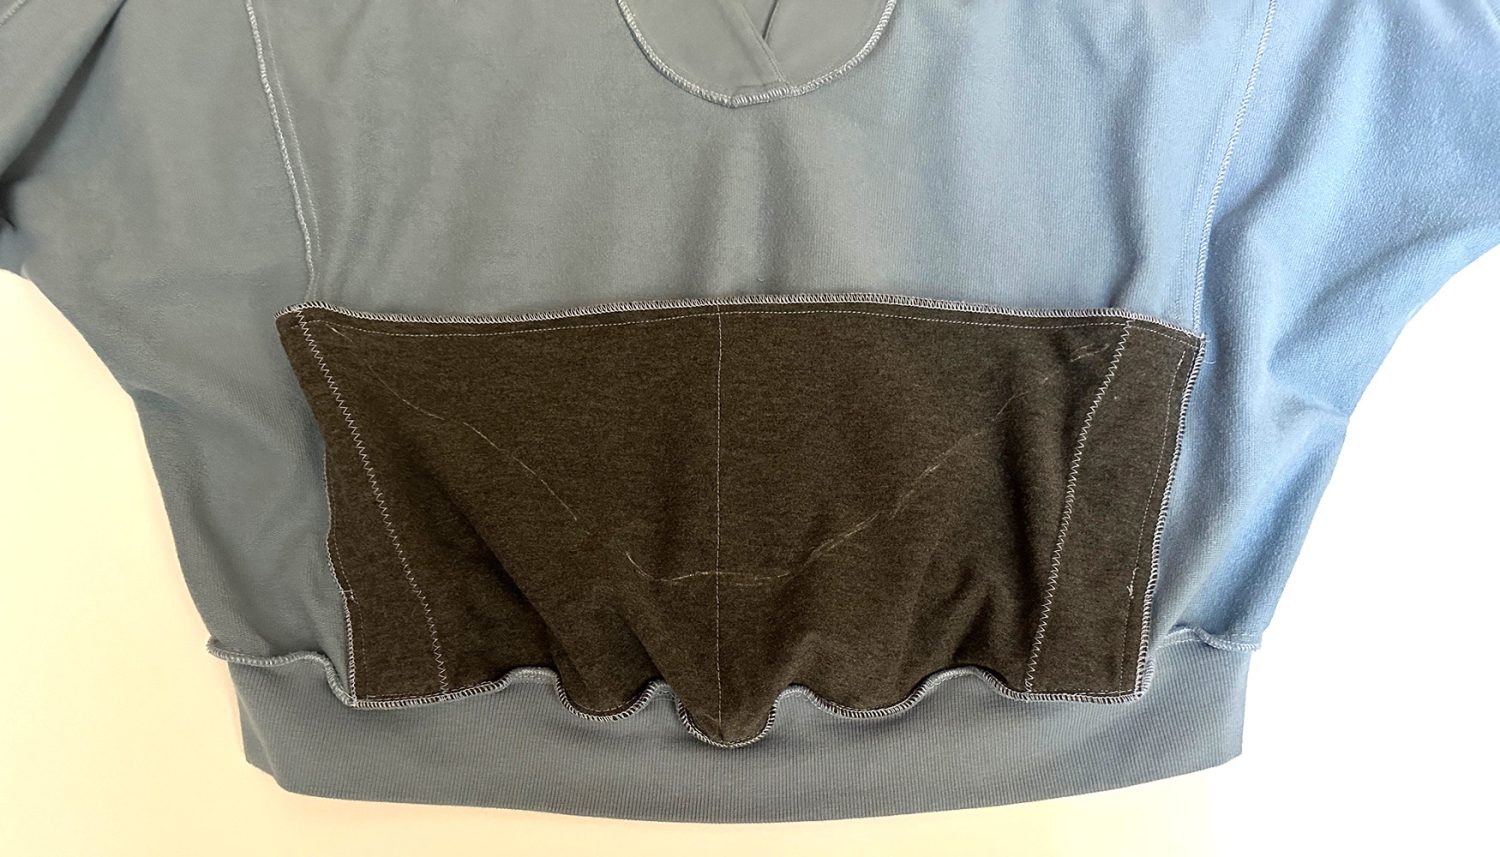
I serged, cutting away pocket fabric to make it narrower in the middle. Now it doesn’t show below the lower band! It worked!
I hope you will sew this fun top and get lots of enjoyment wearing it.
SOURCES FOR SWEATSHIRT FABRICS
Support your local fabric stores first. Check out stylemakerfabrics.com for fabrics with matching ribbing.
FOND MEMORIES DESIGNING PATTERNS
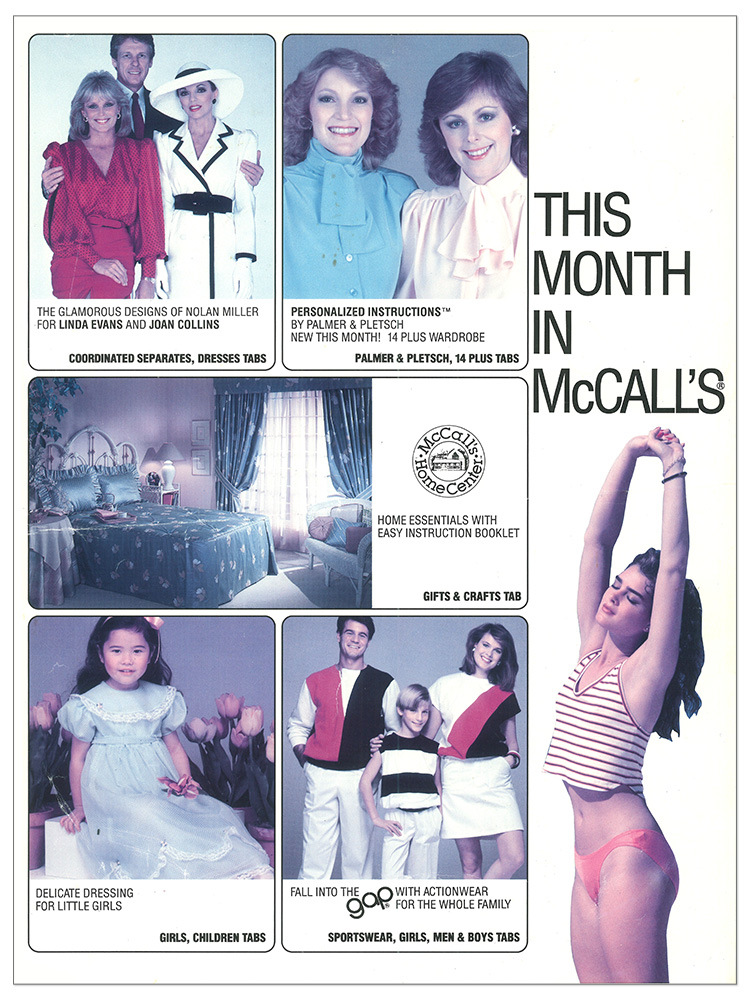
Golly, I am going to miss designing for the pattern companies. I have so many stories I could tell. Fond memories include this poster printed by McCall’s in 1983. Our jaws dropped when we saw Dynasty stars Linda Evans and Joan Collins and another licensee, Brook Shields on the poster as well. When I met Brook in Sun Valley, Idaho, I told her I also design for McCall’s. She said, “I know who you are!” Again, amazed! Another time McCall’s invited us to a dinner they hosted for another licensee, Olympic skater Peggy Flemming. They built her an ice rink for an event at a trade show. (They were selling a lot of patterns in those days!!)
THE FUTURE
After designing and writing the guidesheets for 295 McCall’s patterns, two Vogue, and 33 Butterick for a total of 330 guidesheets, I have decided to pass the baton and let my daughter Melissa Watson Ellis continue supplying Palmer/Pletsch patterns to McCall’s. And for Butterick, see below!
Most of all I appreciate all of you who have trusted us to be a resource for you and given us feedback, pattern ideas, and who have appeared in our books and blogs through the years.
Happy Sewing!
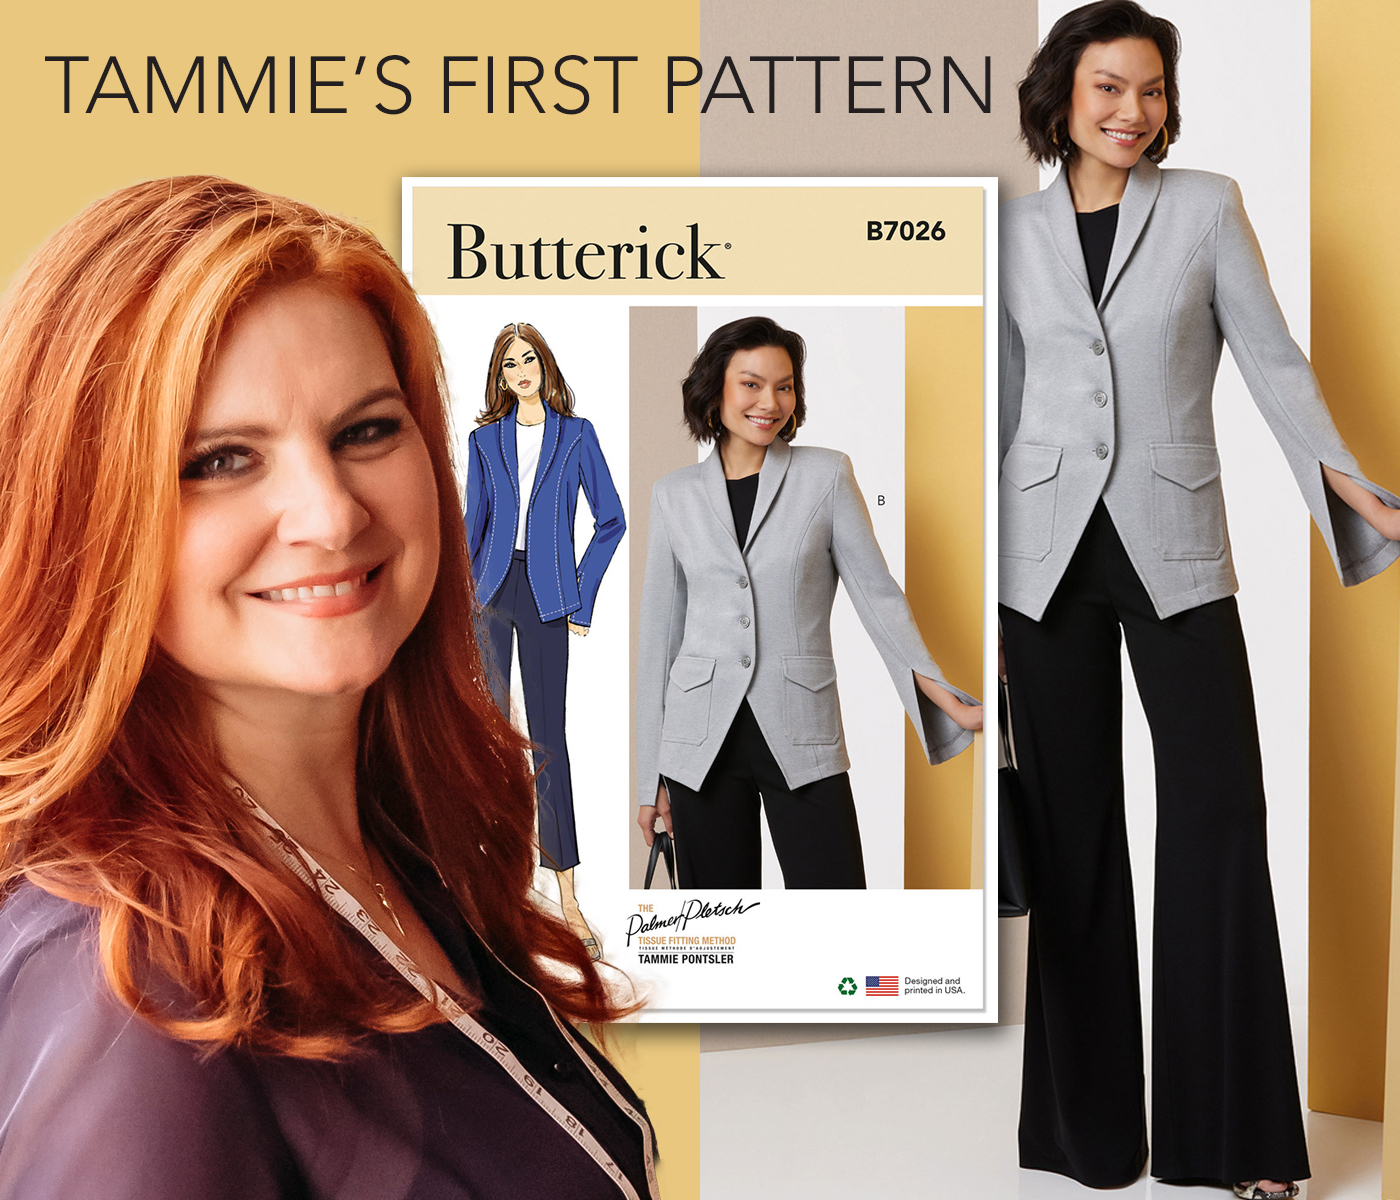
THE NEW PALMER/PLETSCH PATTERN DESIGNER FOR BUTTERICK PATTERNS

For information about Tammie’s other adventures, go to her website— https://tammiepontsler.com/
She is now located in Grand Rapids, Mich. and has a sewing and teaching studio in her home. Not only will she be designing new Butterick Palmer/Pletsch patterns, she is teaching our online classes. She has had a lot of practice from her days of college teaching. There are 1 1/2-hour webinars, 3-hour interactive hands-on classes, and 2-day workshops.
READ THE BLOG ANNOUNCING THAT TAMMIE IS THE NEW PALMER/PLETSCH PATTERN DESIGNER AT BUTTERICK
TEACHER FEATURE—lyndsey stanfill
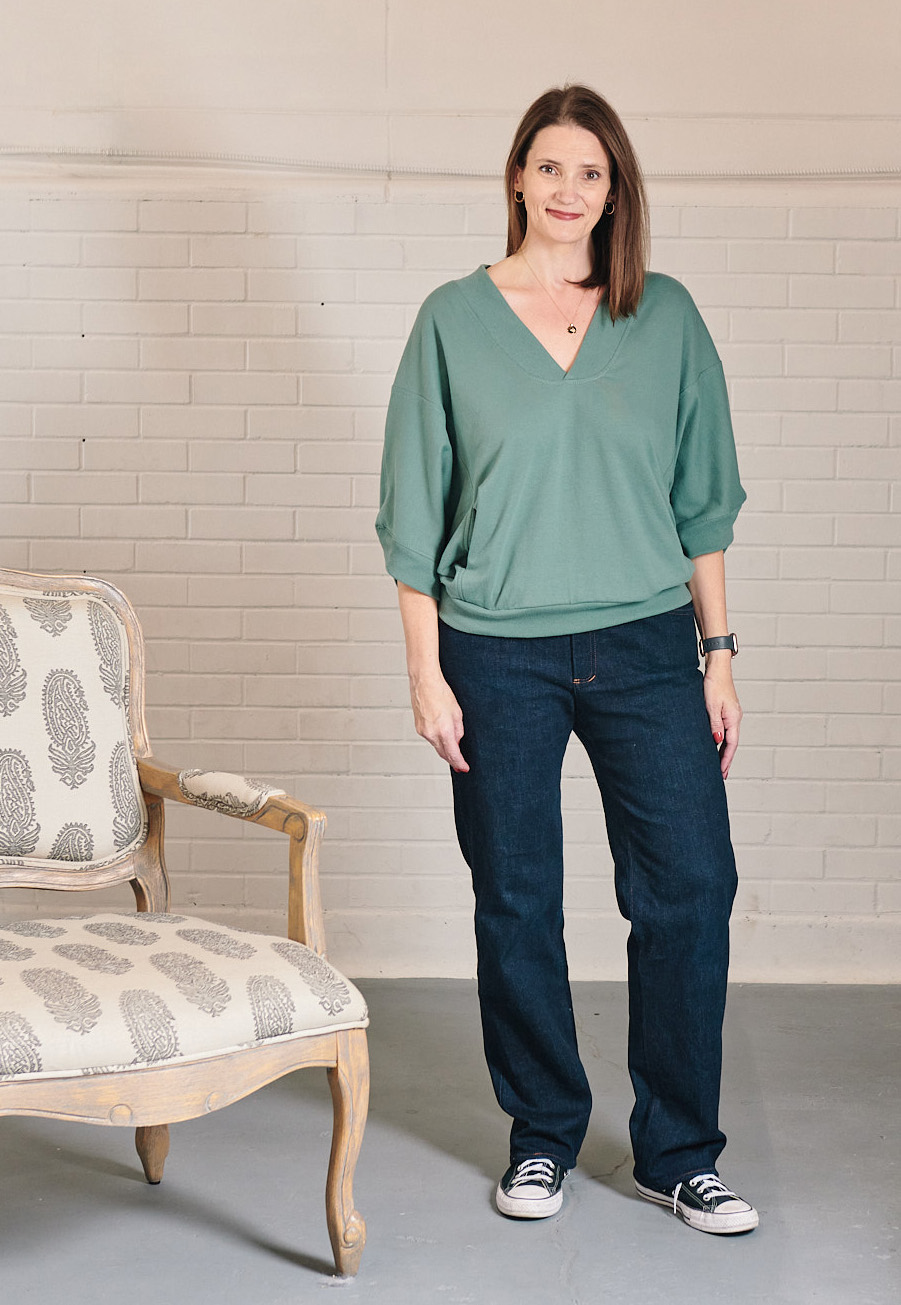
Lyndsey Stanfill is a Certified Palmer/Pletsch Sewing Instructor and offers Palmer/Pletsch Workshops in her Louisville, Ky. school, Made Stitch Company. She has offered The Polished Sweatshirt hands-on sewing class in her studio.

Lyndsey Stanfill wears her polished sweatshirt as she prepares to teach a class on sewing it.

WE OFFER AN ARRAY OF RESOURCES FOR SEWISTS

WORKSHOPS

INTERFACINGS
STREAMING VIDEOS


Thank you for inspiring me. I am enjoying sewing and learning more than ever. Happy retirement!!!
Thank you. I hope you are getting a good fit with your patterns!! Pati Palmer
Thank you, Pati, for all the years designing wonderful patterns, writing great books (I have them all!), and providing us with notions we can use! I’ve followed you and Marta for many years and have sewn a lot of your patterns. I wish you good health and much happiness in the next chapter of life!
Debby
Debby, Thank you for the kind words and support over the years. I will not be fully retired for awhile. Love writing blogs and will be helping Tammie as she gains experience doing patterns, writing the guidesheets, and working with our teachers to find ideas for new designs that are good for teaching fit. Thank you again. Pati Palmer
Hi, Pati. You and Susan Pletsch were major influences on my sewing abilities and aspirations from the time I discovered “Mother Pletsch’s Painless Sewing” in 1975. I’ve bought nearly every book you published and still have most of them. Many moves on two different continents and three trans-Atlantic moves meant that I’ve had to get rid of books occasionally, but I still have my P/P books, some dating back to the ’70s and ’80s and held together with tape along the spines.
Three techniques I learned from your books that particularly stand out for me are for your sleeve seam placket, welt pocket and a method in Sensational Silk that I’ve used many times for hemming the ends of oblong scarves s. Oh! And the radical-at-the-time idea of using glue (Sobo, as I recall) to help with constructing garments.
Thank you for making sewing “fun, fast and easy”.
Thank you so much. It is encouraging that our books have been so useful to you. Sincerely, Pati Palmer
I’ve been sewing with Palmer/Pletsch patterns since the 80’s! I have had great success with them all. I’ve learned so much from them and your books. Thank you for making sewing so much fun!
Hi, Susan and I used to use a phrase that in our early years was a goal: Fun, Fast, and Easy. It’s a great way to get the sewing bug, knowing you’ll enjoy it so much that you tackle more challenging projects. Thank you for your comments.
Pati, words are not enough, but they must suffice. You and I began this journey early in the 1970s when your instructions were pinned to the curtain above my 1970 baby blue zig-zag sewing machine. You have joined me in sewing suits for teaching, my husband’s shirts, a pant suit for my mother, clothes for my kids (and now the grands). I sewed all night one night making a dress for my niece who was born with a heart problem — she turned 51 this year! My husband and I wish you many joys in the coming years. Have a fabulous retirement! Thank you, and may God continue to bless and keep you!